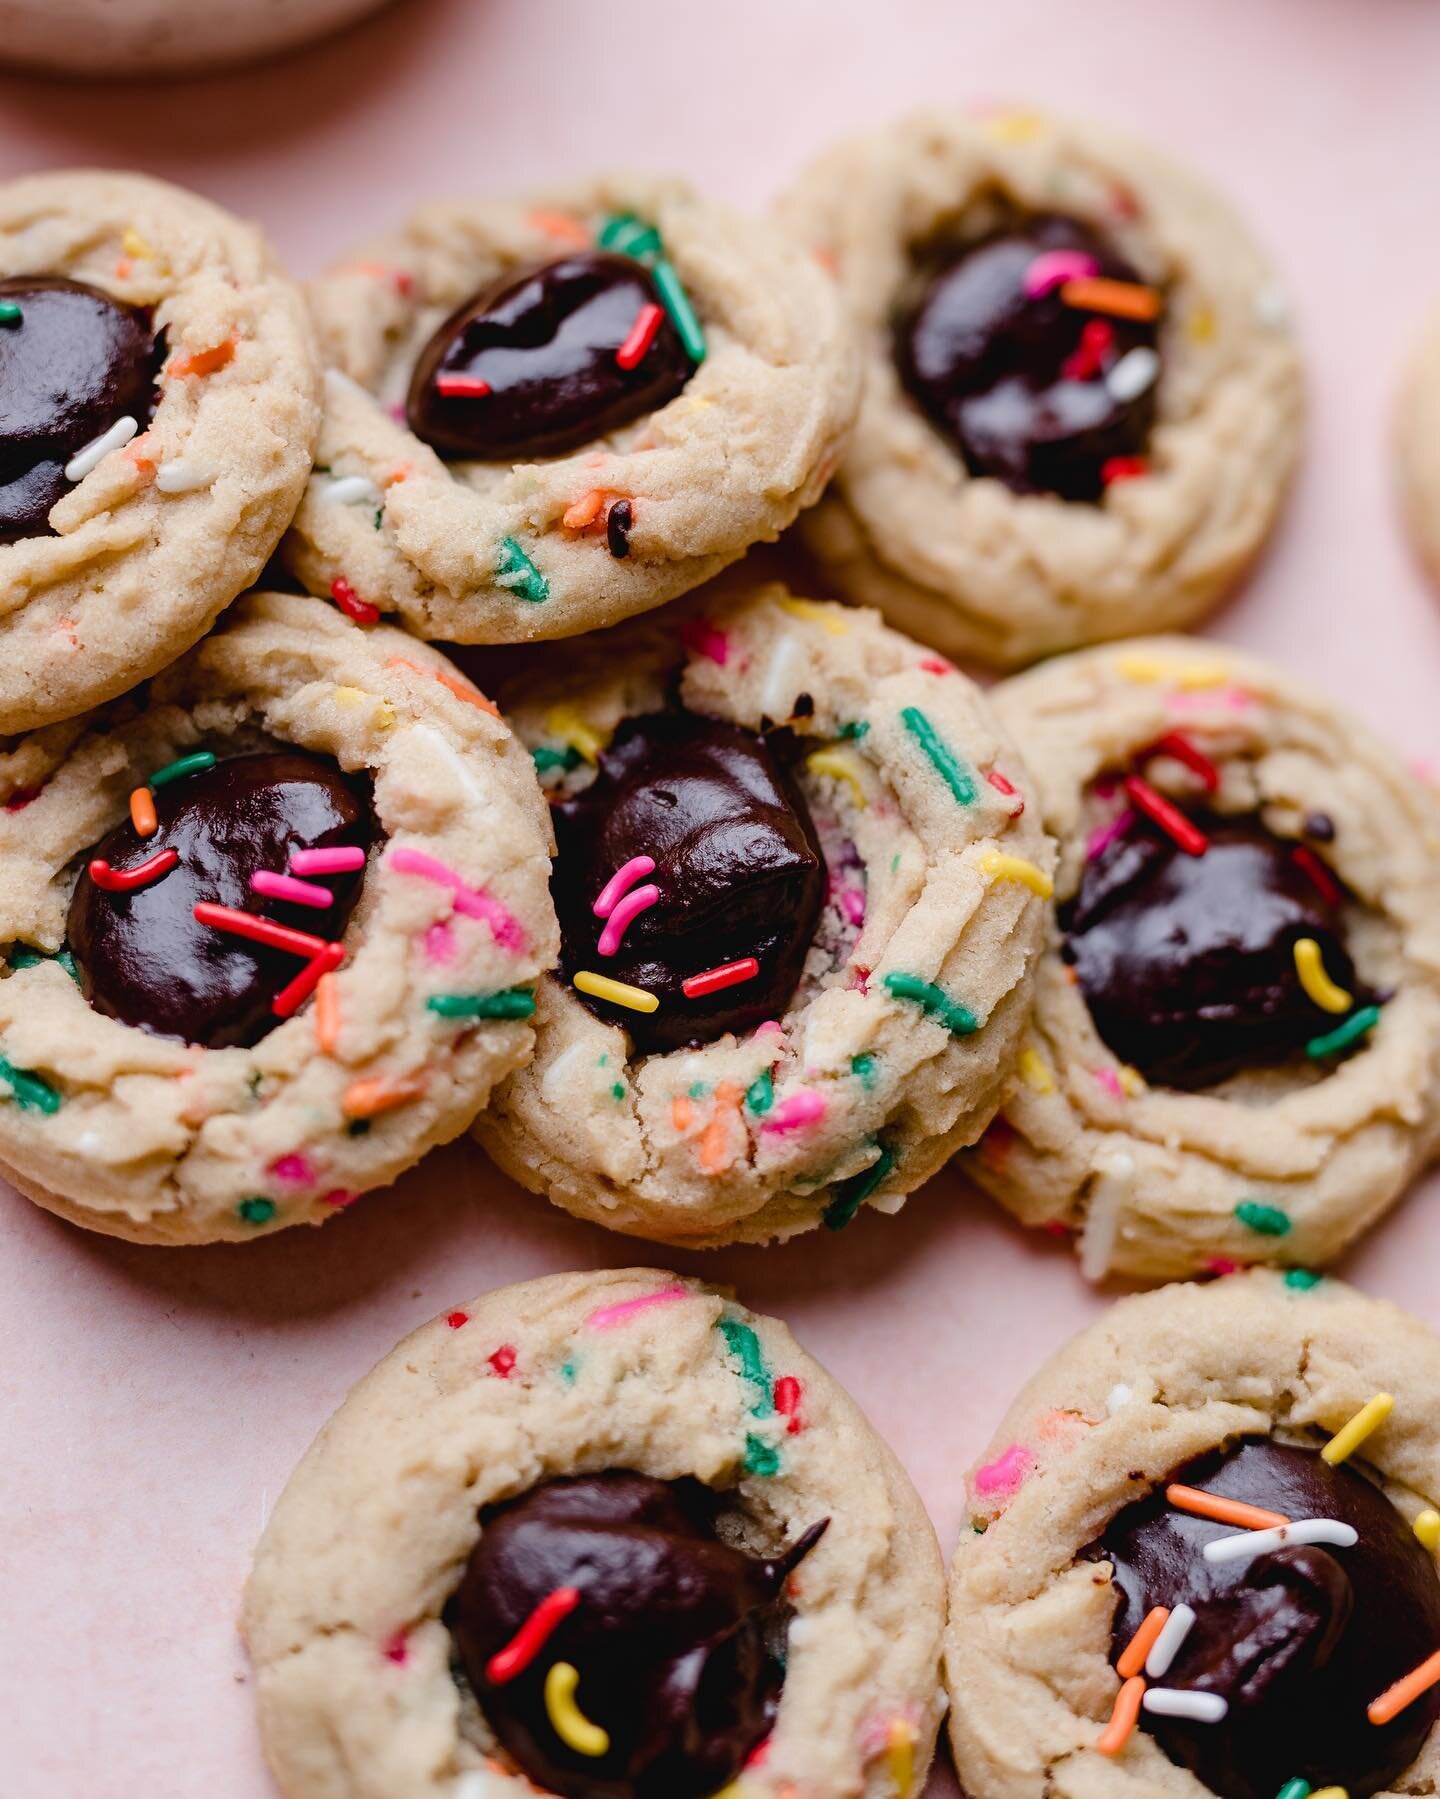
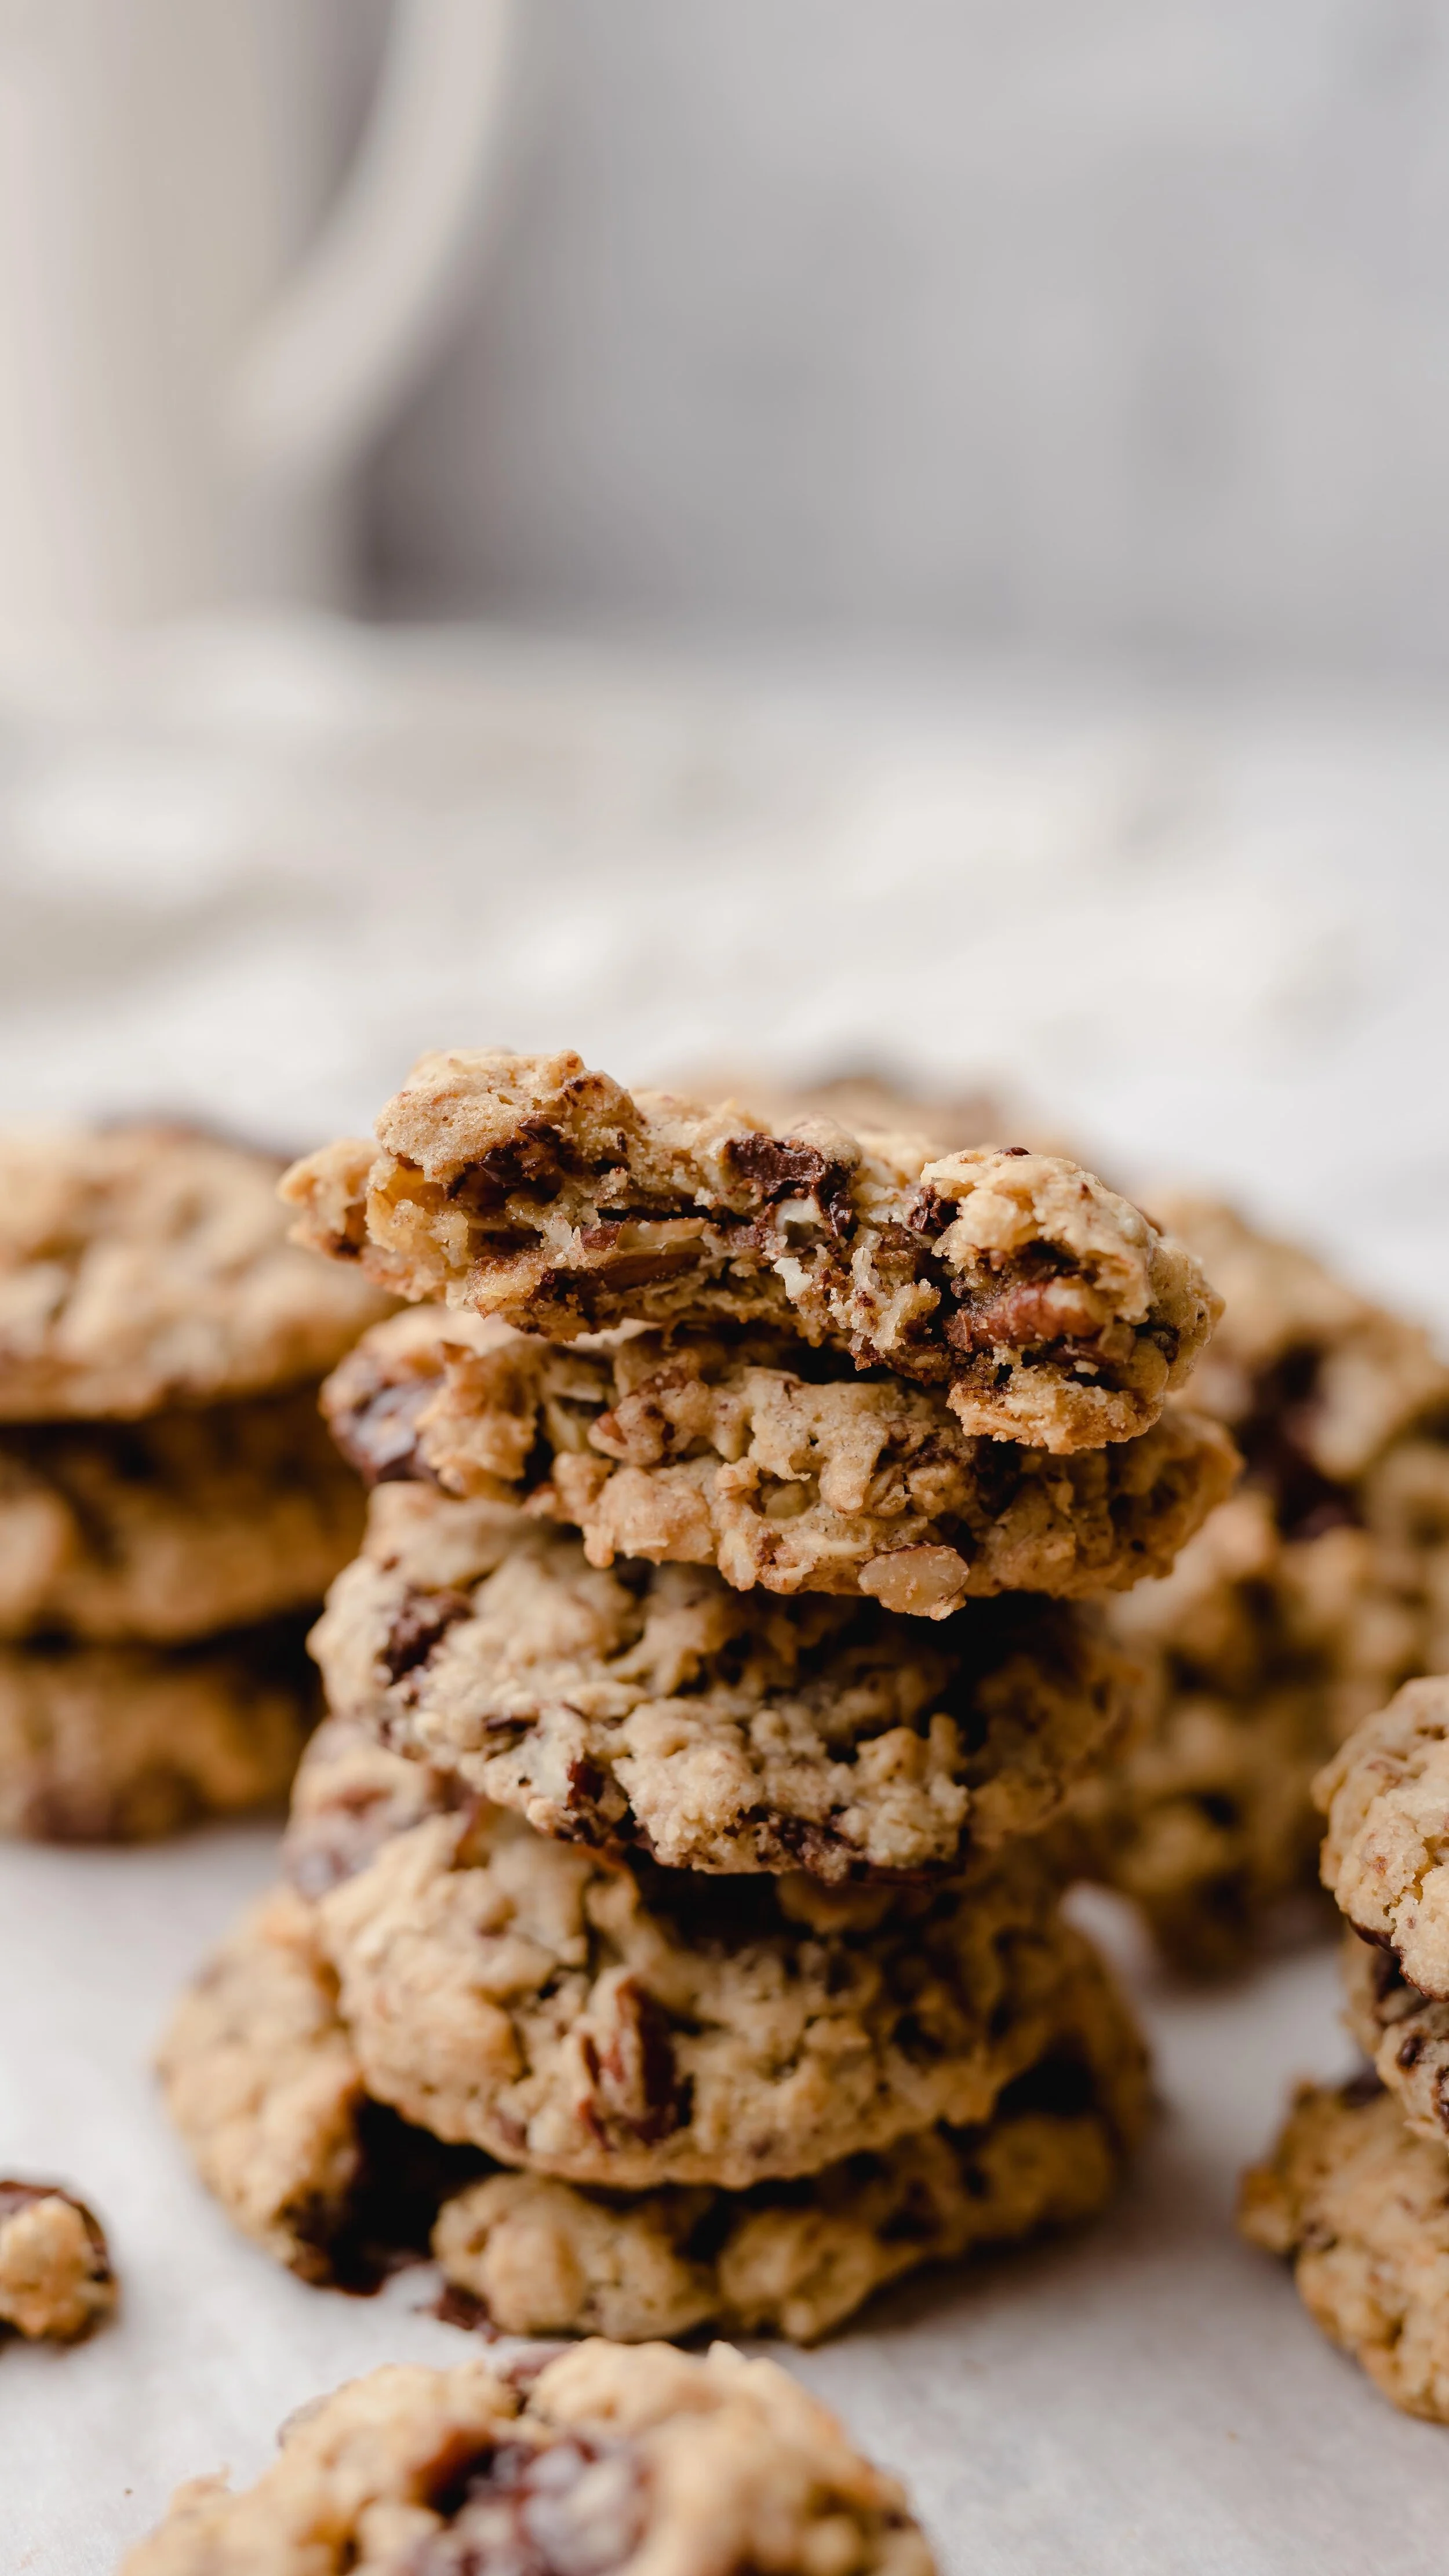
Sprinkle Thumbprint Cookies
With a sprinkle sugar cookie base, and a sweet vanilla glaze filling, these thumbprint cookies are delicious, and sure to please even the grumpiest of critics.
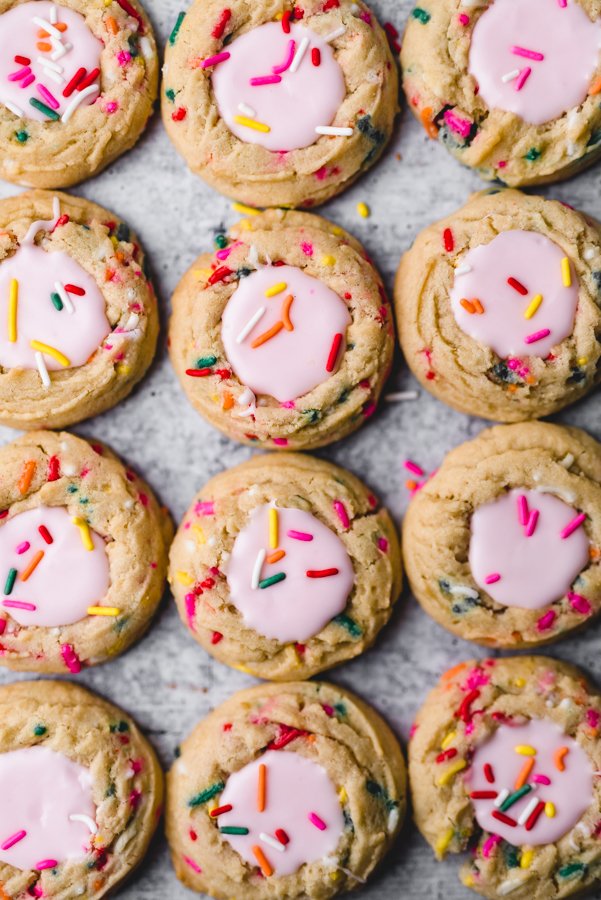
I hope you’re as excited about these cookies as I am. The best part? They are super easy and classically delicious. With a basic drop sugar cookie base, and filled with a simple vanilla glaze, these cookies can be whipped together in a flash, but will genuinely make anyone who eats them smile.
What Makes These Cookies Special?
I adapted this recipe from my cutout sugar cookies, wanting a simpler version of a sugar cookie with icing. I added sprinkles because (duh), but also, sprinkles add additional texture when eating. Within this dessert, both vanilla and almond extract are used; this is meant to boost flavor, making the flavor profile a little more interesting. Unlike traditional sugar cookies that need time to chill in the fridge before rolling and cutting, these cookies can be baked right away, and filled once cooled. Because the glaze solidifies as it cools, they also transfer well.

Cookie Tips
As mentioned previously, these cookies aren’t particularly difficult, but a few tips and tricks will make the process even easier.
1.) Invest in a cookie scoop, aka, an ice cream scoop with a trigger. Cookie scoops come in a variety of sizes, but for these cookies, I use a one ounce cookie scoop. Using a cookie scoop not only aids in appearance, but also allows for even baking in the oven. These are the cookie scoops I use.
2.) Use a small shot glass to make the thumbprint indentation—don’t make the indentation before baking. When the cookies are finished baking, when still hot, gently press the bottom of a shot glass into each cookie creating a small well to be filled with icing, once cooled.
3.) Use a large or better yet, an extra-large egg, when making these cookies. When I originally tested this recipe, I used only egg yolks (that is what my cutout cookies call for), but I felt the cookies were too dry. I landed on using one large egg and the texture was just right.
4.) Either weigh or spoon and level the flour for this recipe. With these cookies in particular, using too much flour will yield a dry cookie. Because the dough does not require chilling, I had to find the perfect balance of flour— enough to provide the cookie structure, but not too much to dry out the cookie.

A Note On The Glaze
When filling the cookie, I went with a simple glaze. The kind my Grandma used to decorate her sugar cookies. It consists of just powdered sugar, milk and vanilla. The glaze will firm up a bit once the cookies are filled, but feel free to use a royal icing or a traditional buttercream, if desired. You could even fill the cookies with a chocolate ganache. As always, tailor the recipe to your liking.
Final Tip
Do not fill the cookies until the cookies have completely cooled. If they are filled when hot, the glaze will melt and get very messy. Further, make sure to create the thumbprint for the cookies while still hot.
Funfetti Thumbprint Cookies

Ingredients
- 1 1/2 sticks salted butter, softened to room temperature
- 1/2 cup granulated sugar
- 1/2 cup brown sugar, lightly packed
- 1 large egg, room temperature
- 1 teaspoon vanilla
- 1/4 teaspoon almond extract
- 320 grams (2 1/2 cups) flour
- 1/2 teaspoon baking soda
- 1 teaspoon baking powder
- 1/4 teaspoon salt
- 1 tablespoon heavy cream
- 1/2 cup rainbow sprinkles
- 1 1/2 cups powdered sugar
- 2 tablespoons milk
- 1 teaspoon vanilla
- pink gel food coloring
Instructions
- Preheat oven to 350 degrees F and line two half baking sheets with parchment paper. Using a stand mixer fitted with the paddle attachment, cream together the butter and sugars on medium-low speed until light and fluffy, 1-2 minutes. Add the egg and extracts and mix until incorporated, about 30 seconds. Scrape bowl as needed.
- In a medium bowl, whisk together the flour, baking soda, baking powder and salt. Add the dry ingredients into the wet ingredients and mix until the dough is beginning to come together. Add the heavy cream and mix until just incorporated. Give the bowl a good scrape, and then add the sprinkles. Briefly mix one more time.
- Using a 1 ounce cookie scoop (2 tablespoons of dough) place cookies on baking sheet a few inches apart. Bake for 5 minutes, rotating pan half way through and baking another 5 minutes. When cookies are finished they should have slightly golden edges.
- Once pulled from the oven, while still hot, create a small well in each cookie. This can be done with the flat end of a small shot glass. Repeat this process until all the cookies are baked, and cooled.
- While cookies are cooling, make the glaze. in a medium bowl, whisk together the powdered sugar and milk. If the glaze is too thick, add a *bit* more milk as needed, until the desired consistency is achieved. Add vanilla and food coloring and mix well.
- Once the cookies have completely cooled, using a spoon, fill each well in the cookie with glaze. Top with additional sprinkles if desired. Can serve immediately but best eaten when the icing has a chance to set.
You May Like These…