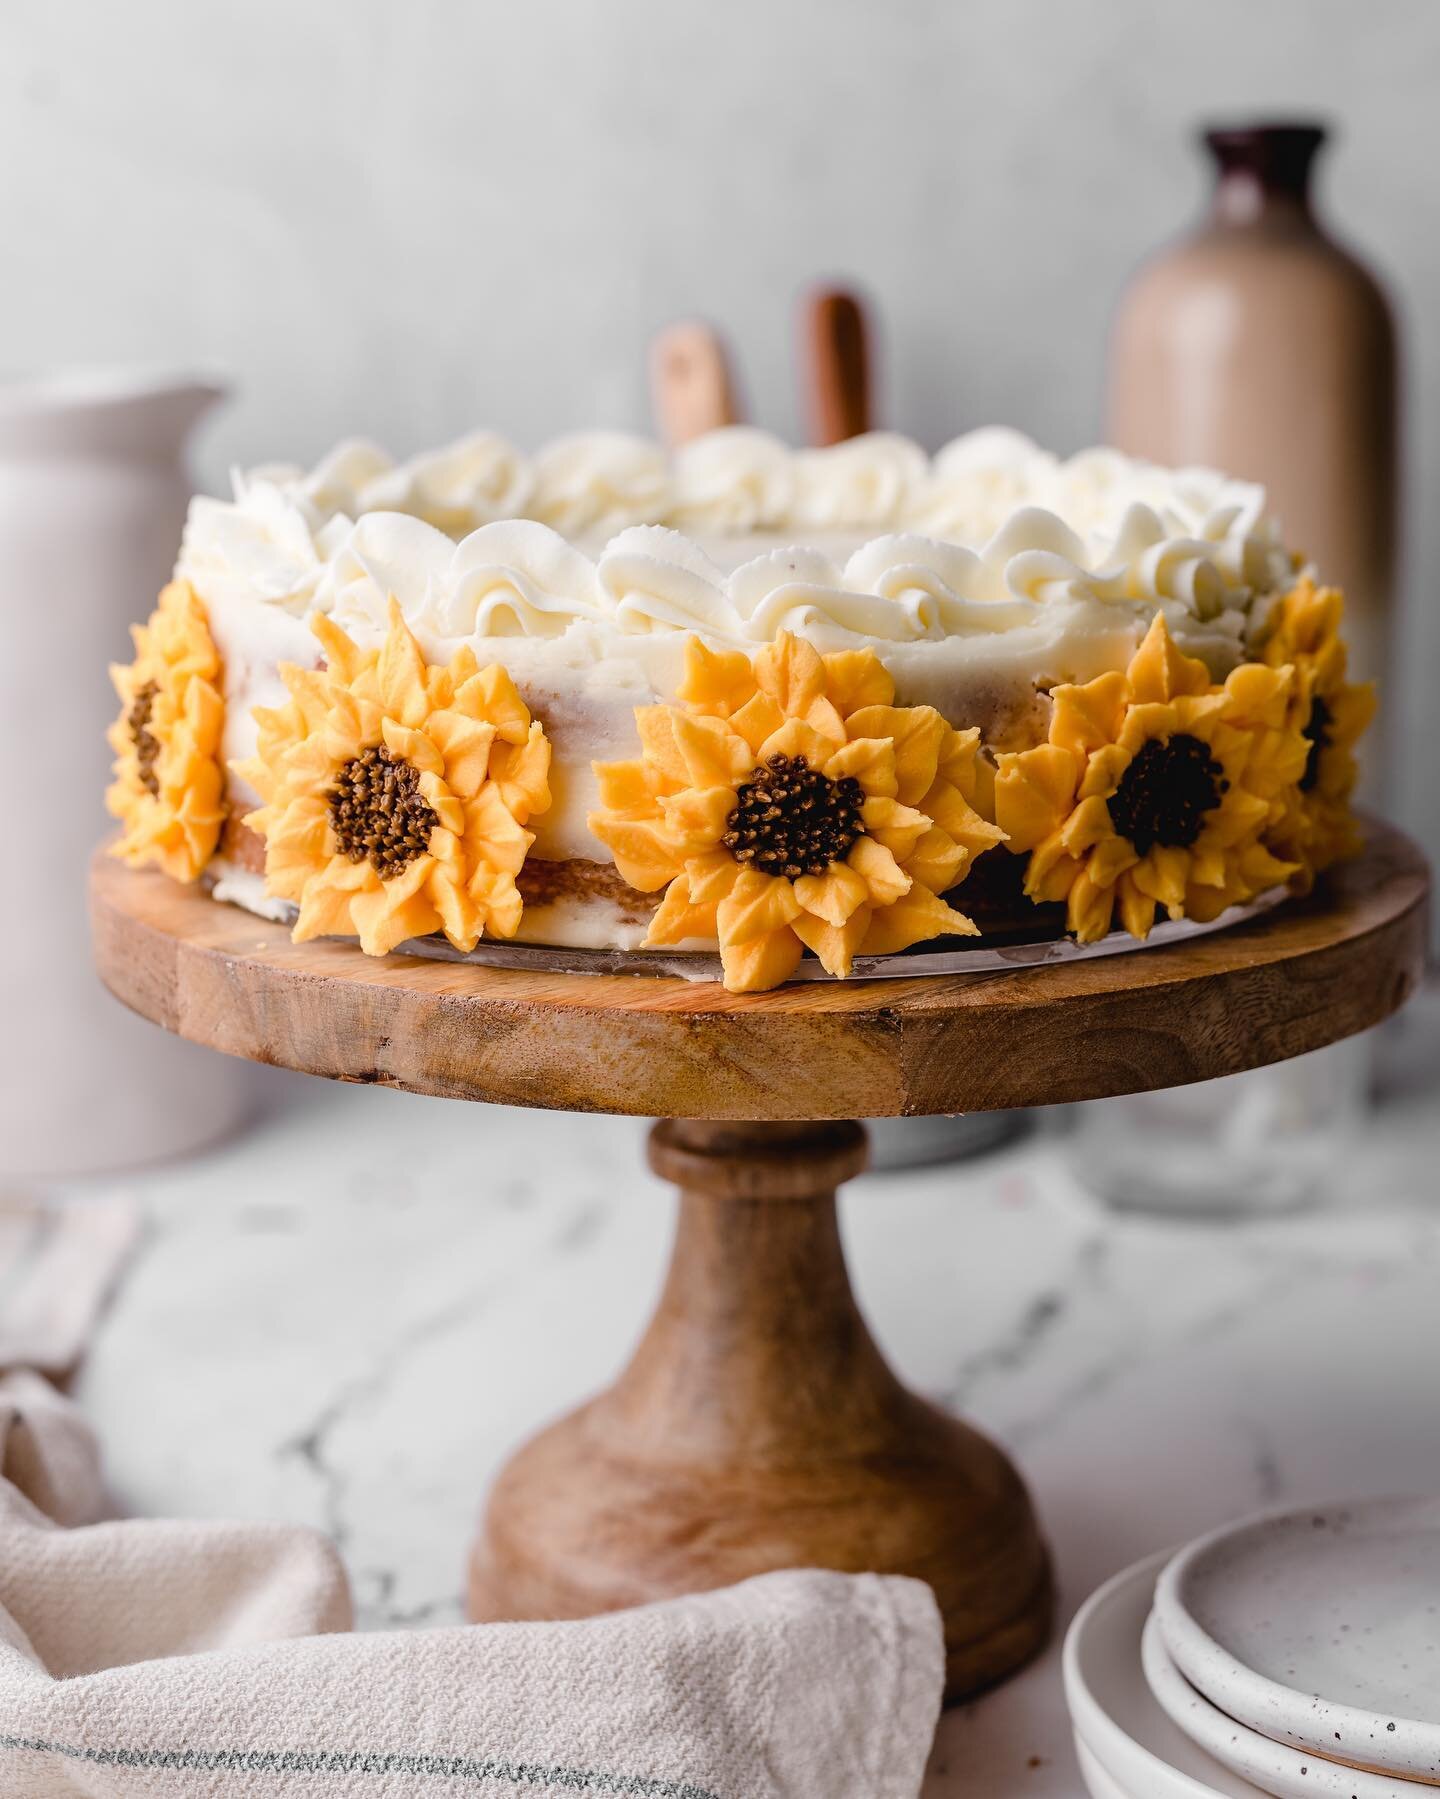
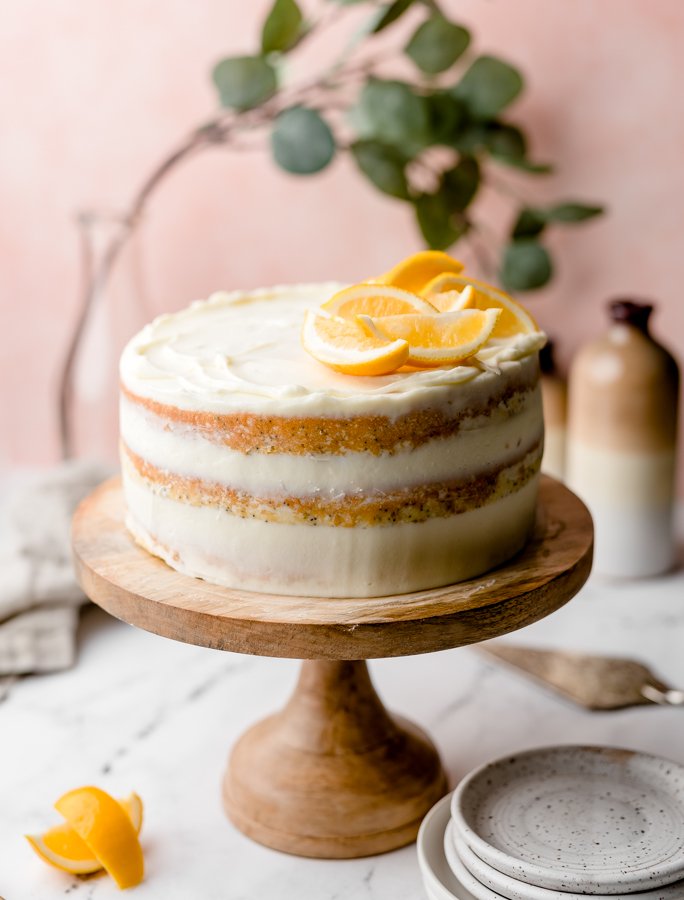
Lemon Poppy Seed Cake
With fresh lemon juice, a delightful poppy seed crunch, and a generous covering of cream cheese icing, this citrus cake is the perfect addition to any special gathering.
I love poppy seeds paired with lemon or almond, and when visiting my favorite bakeries, I often opt for a poppy seed dessert. There is something about the texture that is so satisfactory while eating; it could be the color, the crunch, the uniqueness of the seed itself, but whatever the reason, poppy seeds make for a beautiful dessert.
When recipe testing, I considered using my original lemon cake recipe, and simply adding poppy seeds, but I ultimately decided against it. My lemon cake has a light crumb, and a light crumb is important, BUT a bit more bite is essential for a dessert with poppy seeds. In other words, not as dense as a pound cake, but also not as light as say, a vanilla cake. I went to work, striving to mimic the texture of poppy seed desserts from my favorite local bakeries, and after bumping up the eggs from three to five, splitting them, and ultimately deciding to whisk the egg whites into glossy stiff peaks to fold into the batter before baking, I landed on the perfect texture.
This cake does require a few steps, and if this sounds intimidating, I get that, but once these skills are mastered, the options become endless for many different desserts. My best advice is to go for it! Below are my best cake making tips and an excerpt on whisking the egg whites.
Five Cake Tips
1.) Fluffing the butter and sugars is key. Once added to the mixer, let the butter and sugars mix on medium to medium-high speed for a few minutes. I give time estimates in the directions, but I let the butter and sugars mix—sometimes not even looking at the clock— getting my eggs to room temperature and shuffling around the kitchen preparing the dry ingredients. Further, after adding the 2 tablespoons of oil, I switch the mixer back to medium or medium high speed, continuing to let the batter fluff for a couple more minutes. Why so much mixing? Think of it this way, the air put into the batter in these first steps determines the texture of the cake while baking. The rest of the ingredients, eggs, flour, and buttermilk are added in a certain way to try and protect this first process, in hopes to not disrupt or deflate all the air that was initially put into the batter. A light and fluffy crumb is the end goal. In short, don’t rush it!
2.) Add eggs one at a time. After bringing the eggs to room temperature, crack the eggs into the batter one at a time, switching the mixer to medium for a few seconds until the egg is mixed and the batter is smooth, keeping that fluffy texture. Scrape the bowl, mix again for a just a moment, repeating this method with the remaining eggs. Adding too many eggs at once can split the cake batter. This isn’t the end of the world, but can definitely affect the texture of the cake in a negative way, deflating the air created by fluffing the butter and sugars. If done properly, eggs help to maintain the fluff, while also bringing necessary structure to the cake. You may be thinking, “what if I over mix the eggs?” Good point, and it’s frustrating because recipes often say “don’t over mix,” without giving much explanation, and it’s true, “don’t over mix” is sage advice, but what does that mean exactly? Those words feel like a cop out! The unfortunate truth is it’s often ambiguous, because it is hard to pin point an exact time. Mixing enough is important, but mixing too much can cause a tough or gummy cake. It’s frustrating, I know, but as confidence builds in the kitchen you will learn the balance that is mixing, I promise.
3.) Scrape the mixing bowl at various times while preparing the batter. Using a rubber spatula, scrape the sides and bottom of the bowl bringing any trapped ingredients to the top of the bowl—semi frequently. If a pocket of leavening is trapped at the bottom of the batter it will definitely influence how the cake bakes in the oven. An even batter = a better bake. This is good advice as it is simple and effective.
4.) If included, turn on the convection setting for baking. If your oven does not have a convection feature, don’t worry, just be aware cake pans can finish baking at different times—heat isn’t always distributed evenly. Even with the convection feature used on my oven, I rarely pull my cakes out at the same time, but the convection feature does help to circulate the air helping the cakes bake evenly. Many people don’t use this feature or know it is a viable option. In short, if you have it, use it.
5.) Don’t delay getting cake pans into the oven. This does not mean rush in making the batter, but it does mean get your cakes poured into their pans swiftly and into the oven promptly. For example, don’t take a phone call when you’re about to put your cakes in the oven, or get distracted with the doorbell. Remember all the work that just went into ensuring a light and delicious crumb. Inevitably, if the cakes are left on the counter they will start to deflate before they have had a chance to bake. This is doubly true for cakes that have egg whites mixed in before baking! Don’t squander your efforts and get those beautiful pans into the oven.

Whisking Egg Whites
This step requires a bit of concentration and skill, but as said previously, once mastered it opens the door for many other desserts. Before starting, be sure the egg whites are room temperature—this provides proper fluff and texture as the egg whites stiffen. Secondly, when separating the eggs, be sure the egg yolk doesn’t break, leaving behind fat residue, and further, that the mixing bowl is nice and clean.
Using a stand mixer with the whisk attachment, begin whisking the eggs on medium low speed. Once they are frothy and bubbly, crank the mixer up to medium high, and slowly sprinkle the sugar into the whites. With this step, practice makes perfect. You don’t want to add the sugar too fast or the egg whites won’t form as successfully, but similarly you don’t want go too slow, because the window to get those glossy peaks, and distribute the sugar evenly, is brief. Some cake recipes don’t call for adding sugar into the egg whites as they mix, but this was always done at the bakery I worked at previously, and I feel it allows for a fluffier and glossier “meringue”, making it easier to access the peaks and desired consistency. Once the egg whites are close— nearing stiff peaks but NOT brittle and dry—I often stop the mixer, remove the whisk attachment, swirl it around the whites to grab some of the meringue, and then flip the whisk upside-down, with the peak of the whites facing up. The egg whites should be glossy, and the peak should be facing upward, not heavily sagging to the side, which indicates they need to be mixed a bit longer. But be careful as whites can go from perfect to over whipped and dry quickly. I would argue it’s better to have the whites slightly softer, rather than dry and brittle.
Once the egg whites are the proper consistency, gently fold them into the batter. Softly and with finesse, try to distribute the egg whites evenly. The egg whites are meant to provide additional lift to the cake giving it an ideal texture. Once evenly distributed, stop mixing! A light hand is key.
Truth be told, I use to be stressed by this type of baking, but now I LOVE it! Why?? Because when you master more challenging tasks in the kitchen a skill is formed—a true to life skill that can yield desserts that are just as good, if not better, than a bakery. Don’t shy away from the unknow, embrace it!
Final Tip
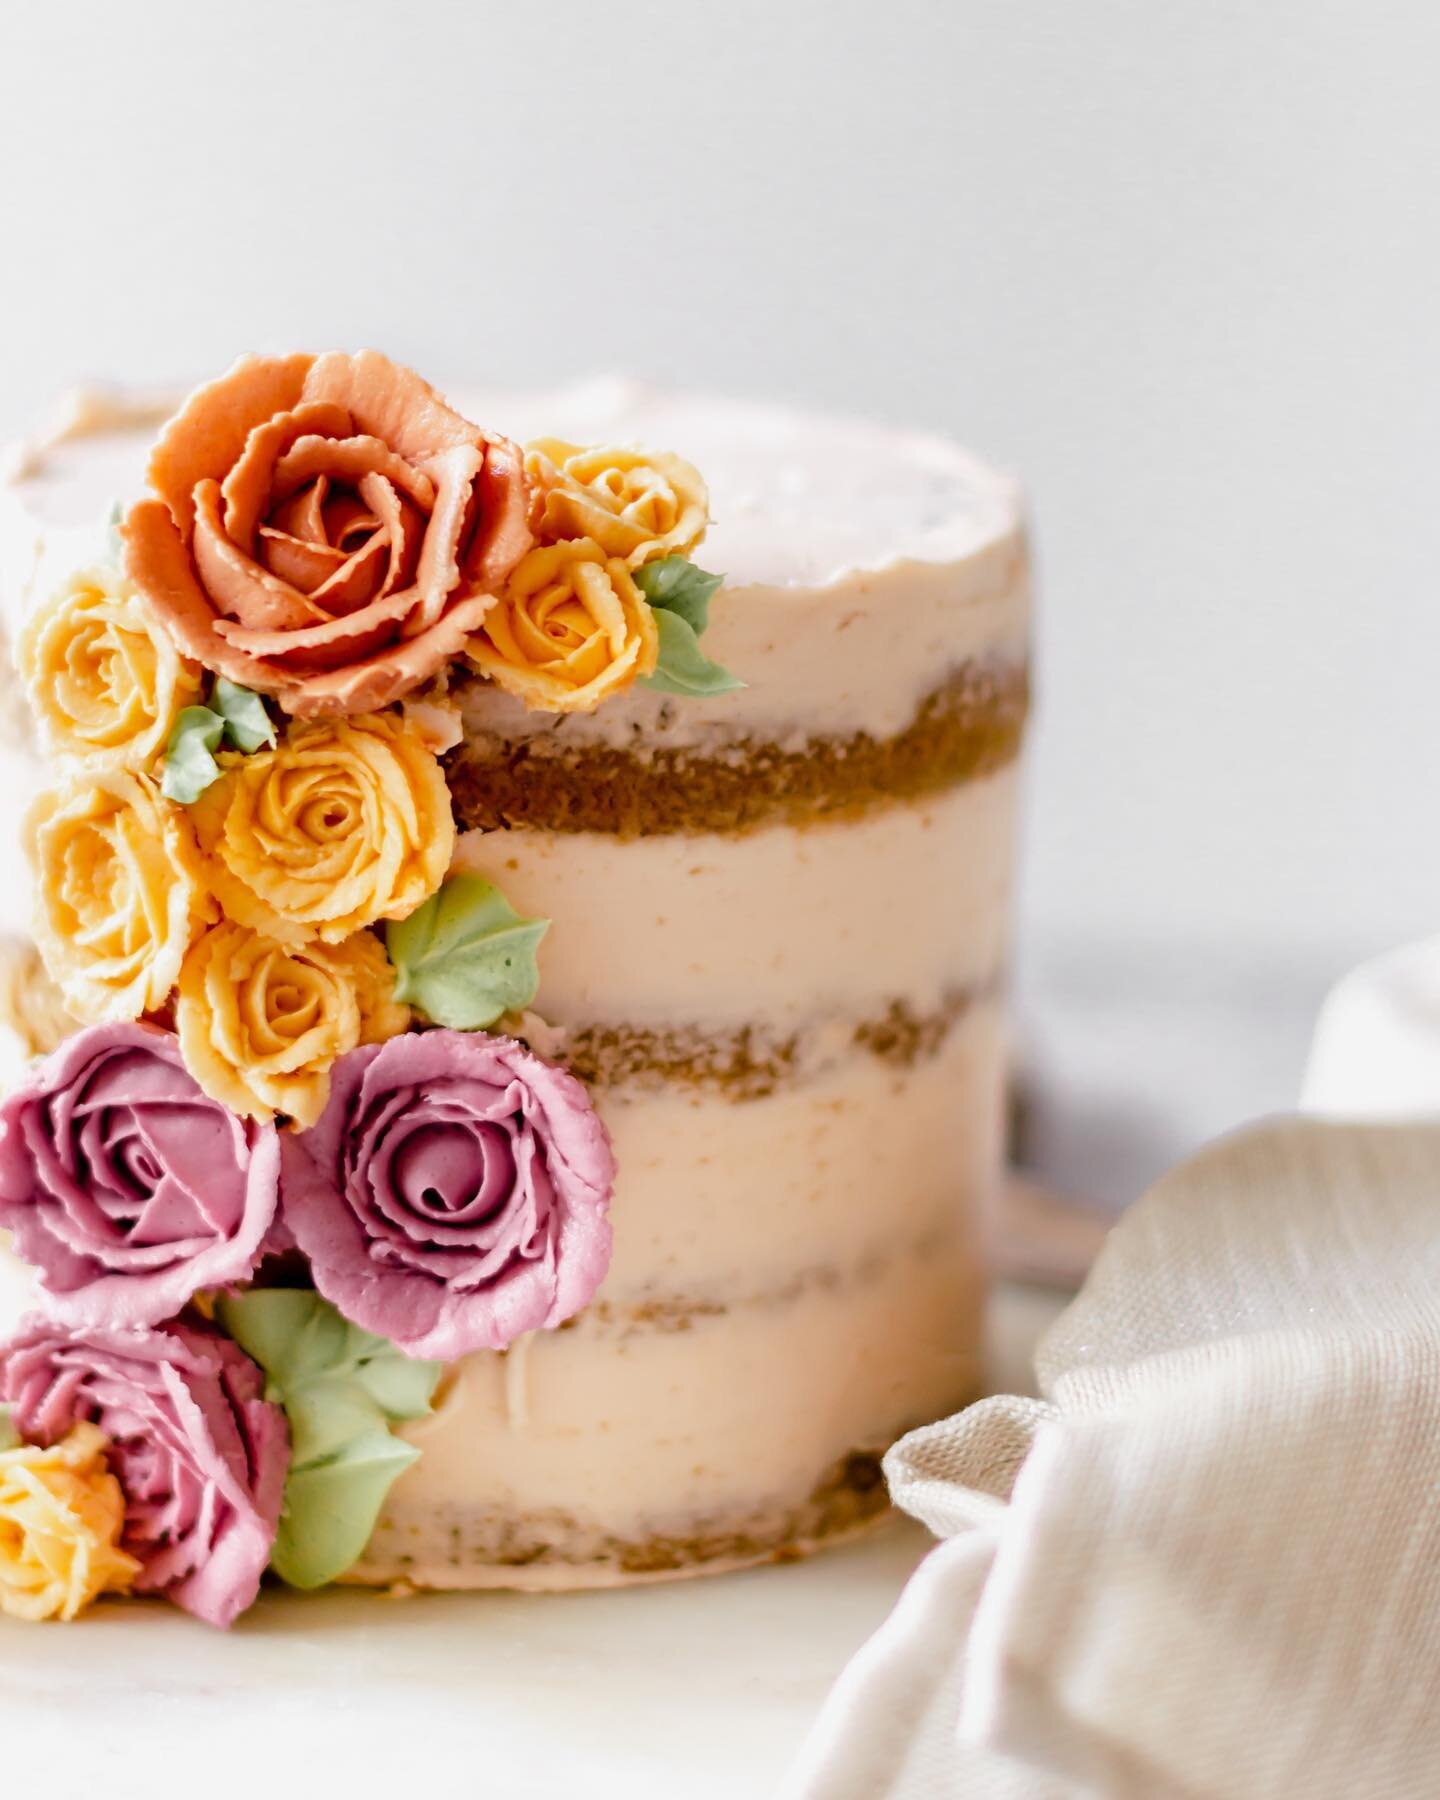
This cake is described as a three layer 9” cake. It can easily be turned into a two layer 9” cake. Simply divide the batter in half between the two pans making for two thicker cake layers. It will be just as delicious and easier to decorate. Keep in mind the baking time may need to be increased, as the cake layers will be thicker when baked. Alternately, this cake could easily be made into a four layer 9” cake. Simply divide the cake into two 9” pans and once baked, using a very sharp knife, cut the layers in half, making four thinner cake layers. Stack and decorate as indicated in the instructions.
Lemon Poppy Seed Cake

Ingredients
- 1 cup salted butter
- 2 cups granulated sugar
- 2 tablespoons canola oil
- 5 large eggs room temperature
- 2 teaspoons vanilla
- 3 cups cake flour
- 1 teaspoon baking powder
- ¼ teaspoon salt
- 1 cup buttermilk, room temperature
- 4 tablespoons fresh squeezed lemon juice
- zest of one small lemon
- ½ cup poppy seeds
- 1/4 cup additional granulated sugar for the eggs whites
- 1 and 1/2 cups salted butter, softened to room temperature
- 8 ounces cream cheese, softened to room temperature
- 5-6 cups powdered sugar depending on desired sweetness and consistency
- 2 tablespoons lemon juice
- Pinch of lemon zest
- 1 large egg
- 4 large egg yolks
- 1/2 cup granulated sugar
- 1/3 cup fresh lemon juice
- Zest of 1 small lemon
- 3 tablespoons butter, room temperature
Instructions
- Preheat oven 350 degrees F. Butter and flour three 9" cake pans. To guarantee the cake won't stick, line the bottom of the pans with parchment rounds. Set aside.
- In a mixer, fitted with the paddle attachment, cream the butter and sugar on medium speed for 3 minutes. Drizzle the oil into the bowl on medium low speed. Once incorporated, turn the mixer back to medium speed for another 1-2 minutes.
- Using two small bowls, separate the eggs, careful to keep the egg whites untainted by the yolk. Set the egg whites aside. Add egg yolks one at a time on medium to medium low, mixing briefly between each addition and scraping the bowl as necessary. Add vanilla extract and mix briefly.
- In a separate bowl, using a fine mesh sieve, sift the flour, baking powder and salt. Spoon and level the flour for an accurate measurement.
- Add buttermilk into a glass measuring cup. Alternating between the dry ingredients and the buttermilk add 1/3 of flour into the mixing bowl on low. Immediately follow with half of the buttermilk followed by another 1/3 of the flour and the second half of the buttermilk. Finish with the remaining flour mixture. The mixer should be kept on low, so the flour and buttermilk don't splash out of the bowl. Scrape the bowl, making sure any dry ingredients trapped at the bottom are brought to the top. At this time. add the lemon juice, lemon zest, and poppy seeds, and mix until just incorporated. Set aside.
- Using a stand mixer with the whisk attachment, whisk the eggs on medium low speed. Once froth and bubbles form, move the speed up to medium high, and slowly sprinkle the remaining 1/4 cup sugar into the mixing bowl. Once the egg whites are nearing stiff peaks, but NOT brittle and dry, stop the mixer, remove the whisk attachment, swirl it around the bowl to grab some of the whites, and then flip the whisk upside-down with the peak of the whites facing up. The egg whites should be glossy and the peak should be facing upward, not sagging to the side, which would indicate they need to be whisked longer. Egg whites can go from perfect to over whipped quickly, so watch carefully.
- Once the egg whites are stiff and glossy, gently fold them into the batter. Softly and with finesse, trying to distribute the egg whites evenly. Once evenly distributed, stop mixing! A light hand is key.
- Pour batter evenly into prepared pans. Bake for 25-30 minutes or until a toothpick inserted comes out clean. Watch the cake pans carefully, as every oven varies in temperature. Cool pans for 10 minutes before running a knife around the edge of the pan, and turning out the cake. Place cake on wire rack to finish cooling.
- With an electric mixer fitted with the paddle attachment, mix the cream cheese and butter on medium speed until there are no lumps and the consistency is smooth.
- Add sifted powdered sugar to the bowl, one cup at a time, mixing first on low speed to prevent splashing, then turning the mixer to medium for 10-15 seconds. Repeat process with remaining cups of powdered sugar. Add lemon juice and zest, and mix on medium for a few more seconds. Give the mixing bowl a good scrape and briefly mix one more time to complete the icing.
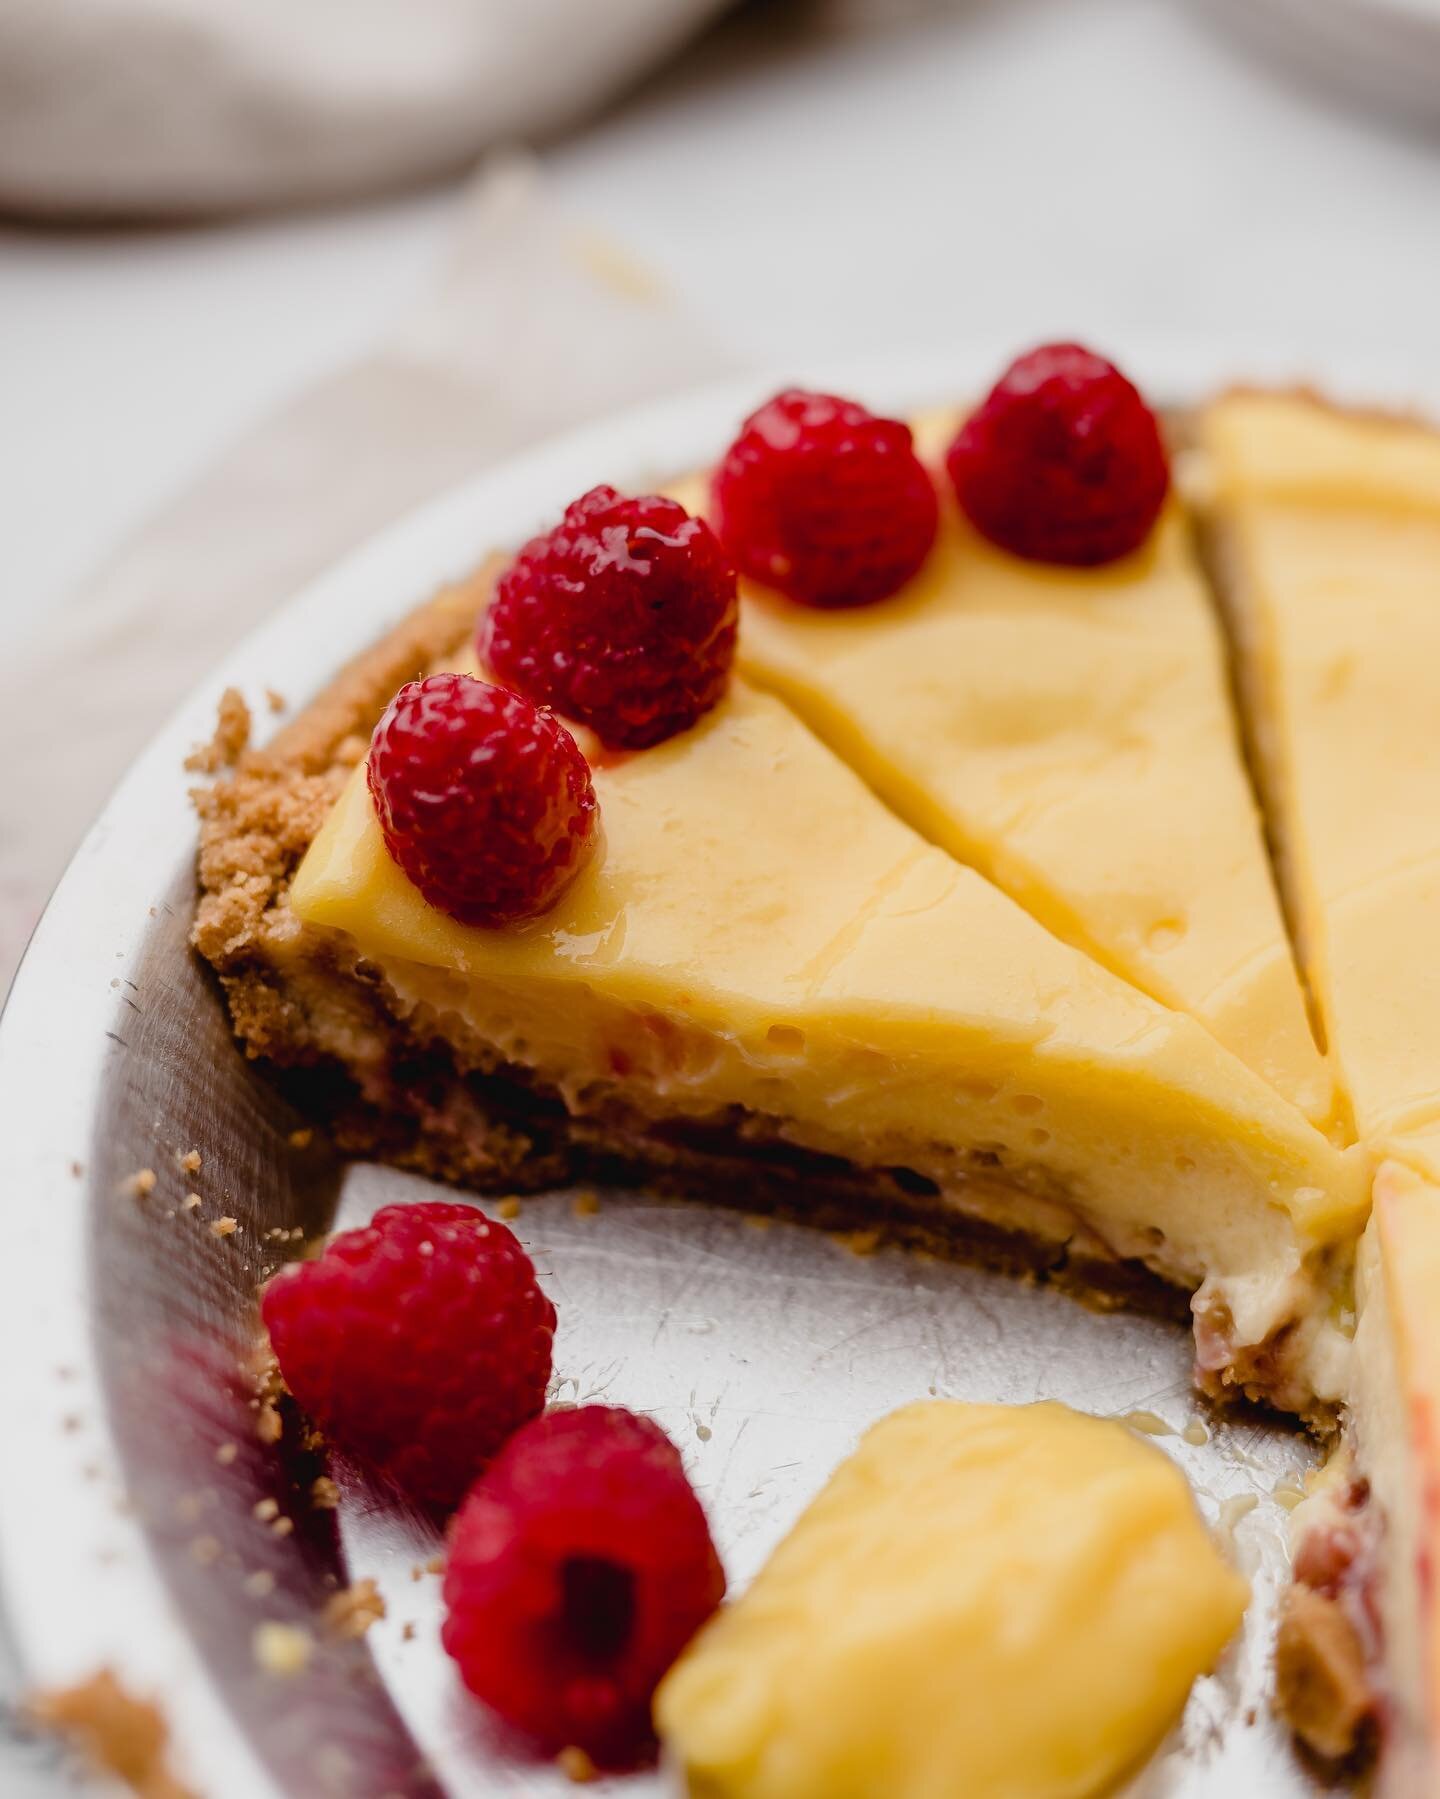
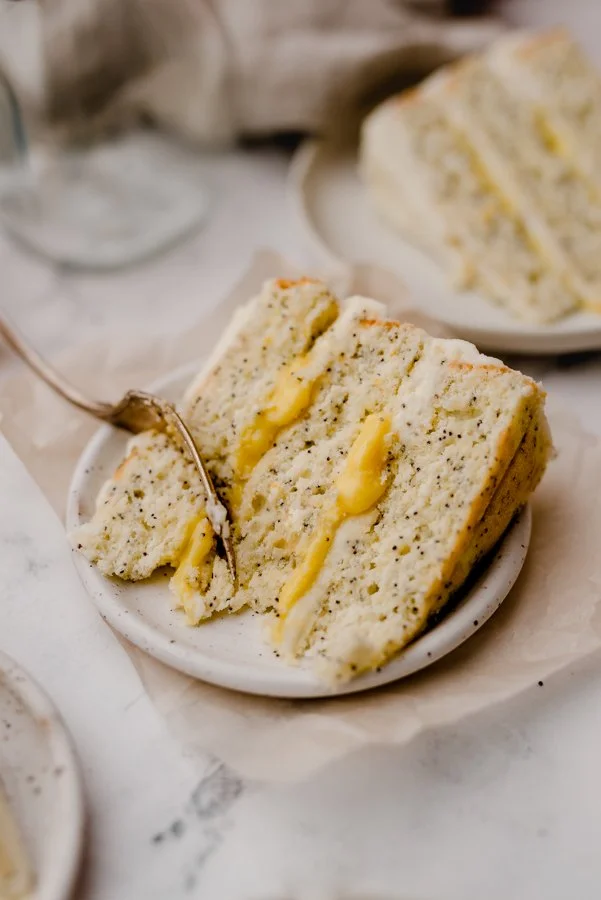
- PLEASE NOTE: This recipe yields about 1 cup of curd, which is more than needed for the cake filling. The rest can be stored up to a week in the refrigerator, and used for other baking projects. Or alternatively, a dollop of lemon curd can be placed on each piece of cake when served.
- Using a double boiler, whisk together the whole egg, egg yolks, sugar, lemon juice and zest. Cook over medium-low to medium heat, stirring constantly, until the ingredients have thickened.
- Once thickened, remove from heat, and press through a fine mesh sieve into a bowl, leaving behind the remnants of lemon zest, and any egg that may have cooked. Immediately stir in the softened butter.
- Cover with a piece of plastic wrap, pressed directly on the surface of the curd to prevent a skin from forming. Place in the refrigerator to cool for 1 hour before filling the cake.
- Place one layer of cake on a clean turn table or cake board with a small dollop of icing underneath. This works as a glue, helping prevent the cake layers from sliding around while icing. Place a large dollop of icing on top of the first cake layer, and spread evenly with a small offset spatula or knife. Place the second cake layer on top of icing and continuing the same process with the third layer. Place another large dollop of icing onto the cake, smoothing the top evenly and letting excess icing drop to the side of the cake.
- With the rest of the icing, using an offset spatula, put a even layer of icing around the entire cake, with a back and forth motion.
- Using a bench scraper (also known as cake smoother) with your dominant hand, hold it steady against the cake, but slightly angled toward the cake, to aid in smoothing, and slowly move the turn table with the other hand, while not moving the scraper and keeping it as straight and steady as possible. As excess icing builds on the scraper, place it back into the mixing bowl, and continue smoothing the cake with a clean scraper. This cake is intended to be semi-naked, so as you scrape the excess icing off the cake, bits of the cake underneath will be exposed. See blog pictures for reference.
- While smoothing the sides, a lip of icing will form around the top of the cake. Using an offset spatula, gently sweep away the lip with a motion toward the center of the cake. Rotate the cake and sweep until the lip has been removed and top of the cake is smooth. Any leftover icing can be used to decorate the cake with a beaded boarder, or another decoration of choice. Store cake in the refrigerator until 2 hours before serving.
You May Like These…