Salted Caramel Whiskey Cake
This cake has the perfect balance of salty, sweet and warmth. It’s all surrounded by a silky cream cheese icing making each slice a little piece of heaven.

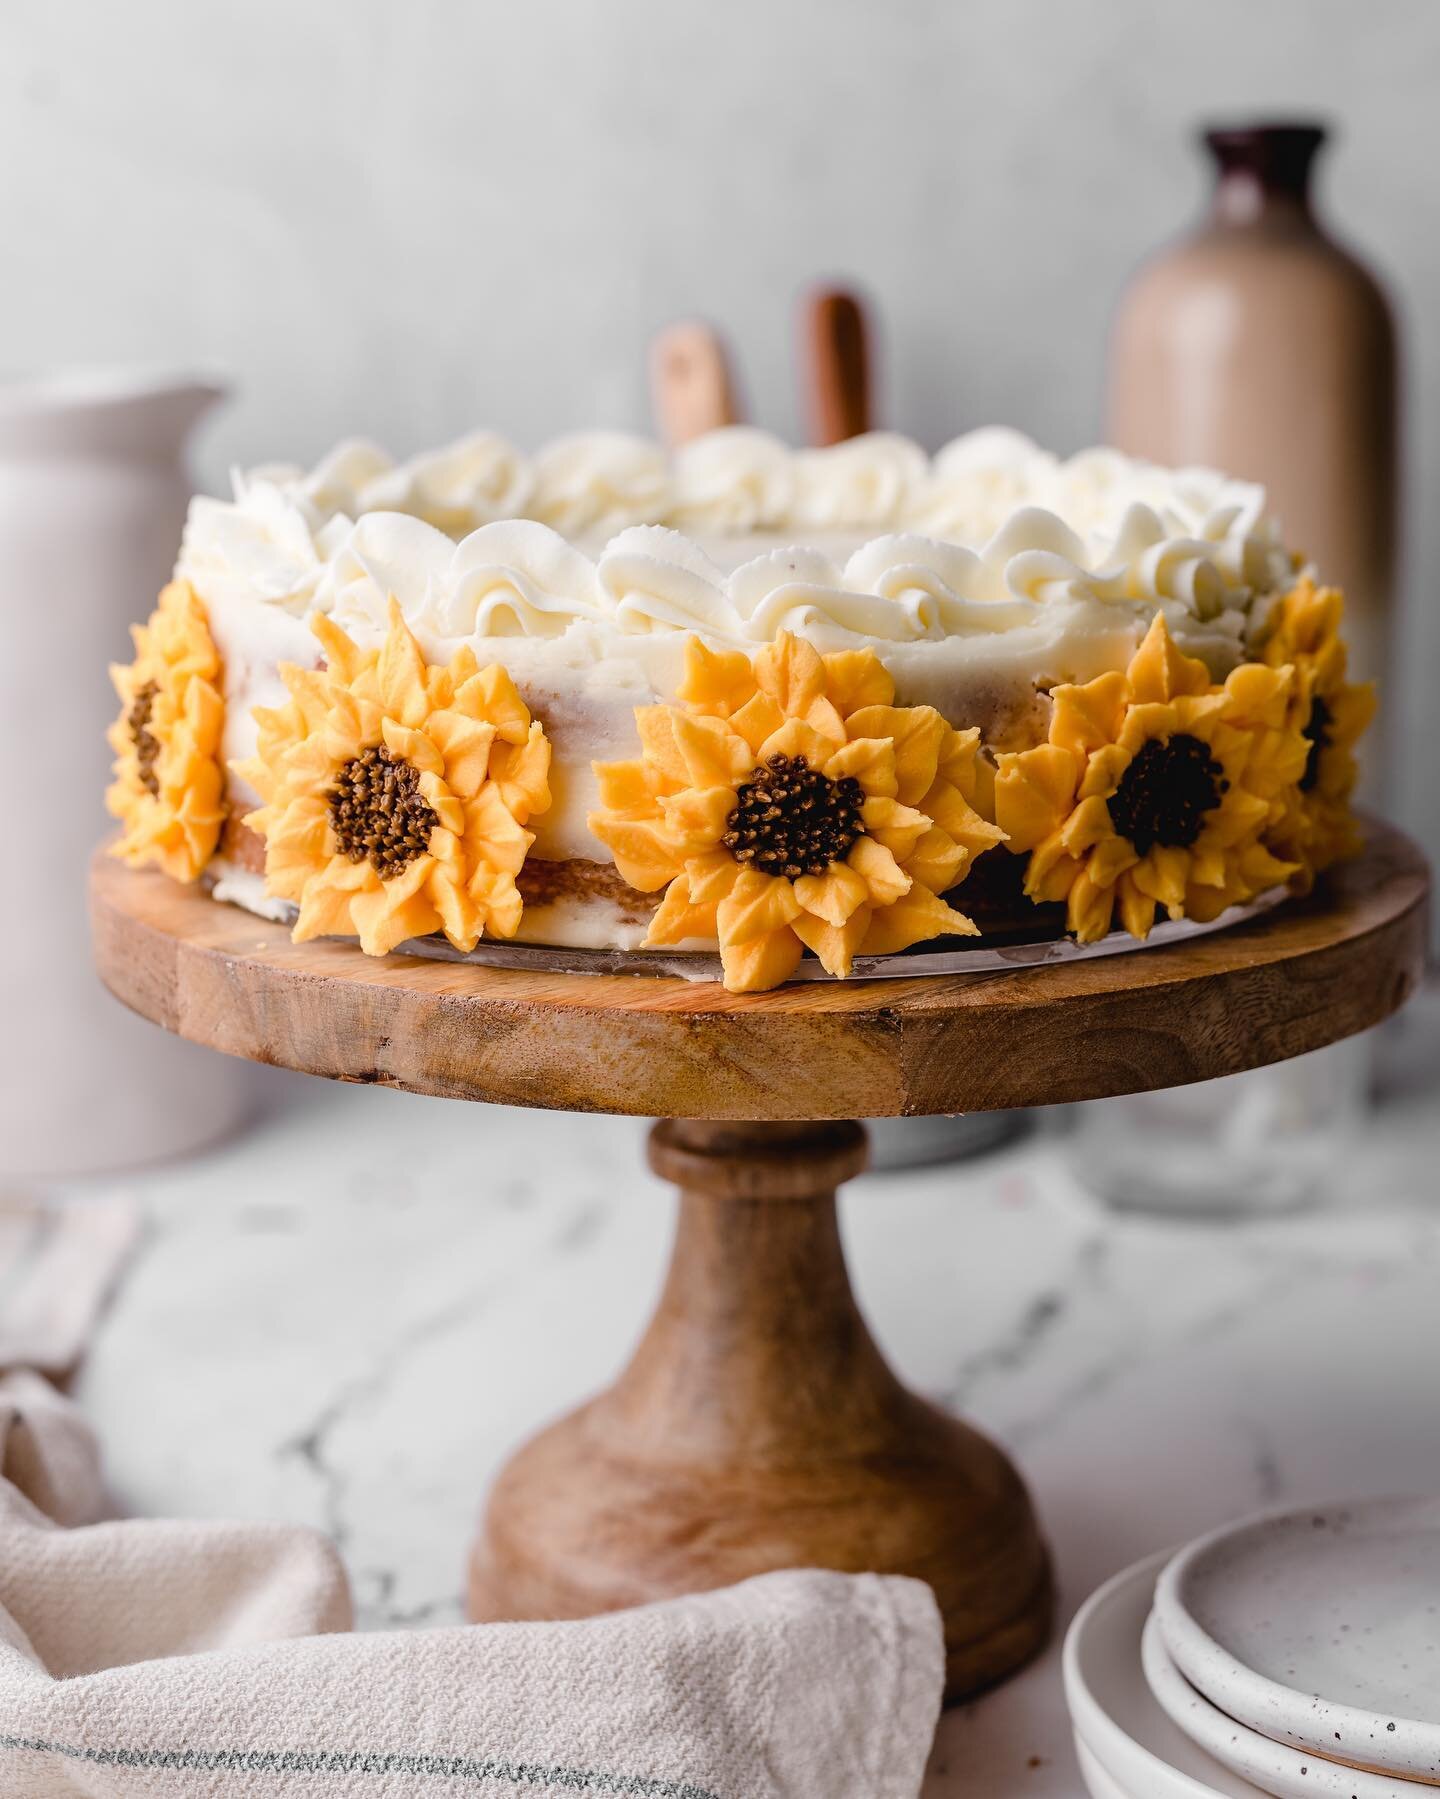
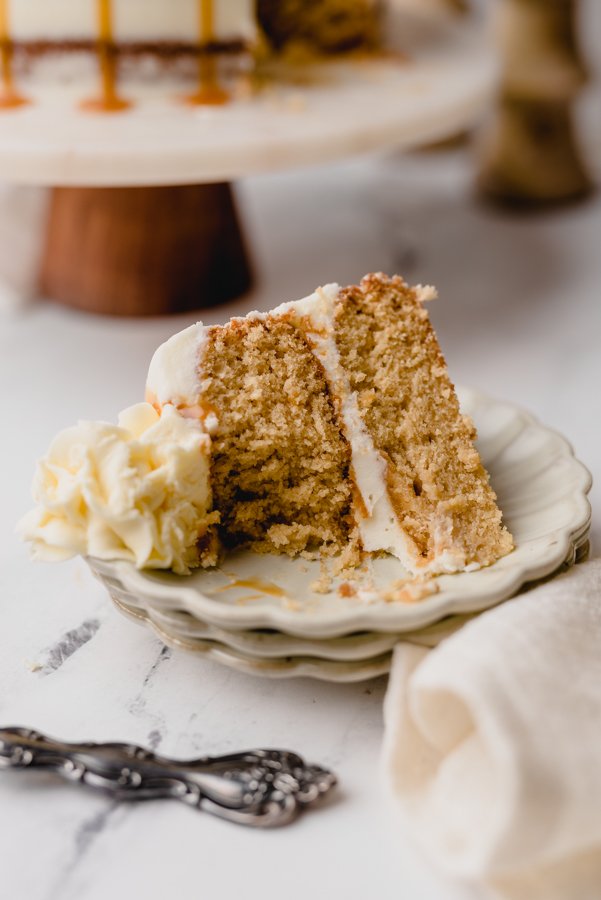
This cake is sweet, salty, has lovely warmth from the salted caramel whiskey, and is covered in a tangy and delicious cream cheese icing. It’s the kind of cake that is sure to impress any guest. Decorate the cake any way you like, but a semi naked look with a caramel drip is a beautiful and relatively easy presentation. Let’s dive in to what makes this cake special.
What Makes This Salted Caramel Whiskey Cake Special?
The standout of this cake is the whiskey. I recently had the opportunity to partner with Bird Dog Whiskey and was so excited to hear about their variety of flavored whiskey. When I learned there was a salted caramel flavor, I couldn’t get my hands on it fast enough. The whiskey I used for this cake can be found here. As with all my cakes, I strive for the softest crumb possible, but with enough bite to satisfy while eating—this cake is no different, boasting flavors such as salted caramel, vanilla and buttermilk. The cake is layered and topped with additional salted caramel (if desired) really bringing the caramel flavor forward and complementing the whiskey inside the cake.

Greasing Cake Pans
Greasing cake pans properly is critical. When greasing cake pans, take a generous amount of butter and carefully spread it evenly over the entire pan, making sure to coat any grooves or indentations in the pan. Once properly greased, add about 2 tablespoons flour into the pan and swirl it around to coat the entire inside of the pan with flour. Lastly, invert the pan, swiftly tapping out any excess flour into the sink. I have had great luck with this method. Personally, I don’t recommend sprays or oils when greasing cake pans. I prefer the old-fashioned way because I don’t want my cake to stick. To guarantee the cake won’t stick, follow the above tips and additionally line the bottom of the pan with a parchment round. These can be purchased pre-cut or can be cut at home using a roll of parchment.
Tips For Making Salted Caramel Whiskey Cake
1.) For this recipe you need a salted caramel flavored whiskey. This is what I use.
2.) Follow the mixing times highlighted in the instructions. For example, it says to mix the butter and sugars for several minutes, this should be followed. These times are listed for a reason.
3.) Spoon and level the flour for an accurate measurement. Measuring the flour correctly will yield a crumb that is light and soft. Measuring incorrectly will yield a dense and lackluster crumb.
Best Way To Store Layer Cakes
When I first started making, and eventually selling cakes, it was a learning curve. How do I tell when the cake is properly baked? How do I store the cake if I don’t want to decorate it same day? How do I get those perfectly smooth edges? Those ruffly tops?
When making layer cakes, there are a few different approaches, but I have found and settled on what works for me. In tackling the best way to store cakes, I have utilized both the refrigerator and the freezer.
Once the cake layers are baked, I let them cool inside their tins for ten minutes before running a knife around the edge, and inverting onto a cooling rack. Once the cakes are cooled, they can either go into the refrigerator or the freezer. If I am planning to decorate the cake the next day, I will place the cake layers in fridge with two layers of saran wrap on each cake layer. Some argue that placing cakes into the fridge dries them out, but I haven’t noticed this with my cake recipes.
If I need to decorate the cake the same day (meaning I need it to cool quickly) or in a few days (meaning I want the layers to stay fresh), I will place the cake in the freezer. To do this, I wrap the cake in saran wrap and then cover with tin foil. Using the tin foil helps the cake from getting frostbite, especially if the cake won’t be decorated for a week or more.
To decorate the cake, no need to defrost the cake before stacking and decorating. In fact, many decorators swear by decorating a frozen cake. It keeps the cake from sliding around, and is easier to work with. Just keep in mind, if decorating with frozen cake, make sure to work quickly as the buttercream will harden as it’s manipulated on the cold cake.
Once the cake is decorated, I store it in the fridge until needed. If the cake is decorated with American Buttercream, and doesn’t have any time sensitive fillings inside, it can technically be left out on the counter without concern, but avoid direct sunlight at all cost. If the cake is covered in cream cheese icing, the cake should remain in the fridge until 1-2 hours before enjoying. Any leftovers should be placed back in the fridge.
Final Tip
Feel free to get creative with other whiskey flavors. Further, feel free to experiment with different buttercreams and icings for the cake. I prefer plain cream cheese as I didn’t want the frosting too sweet, but a salted caramel cream cheese icing or even a swiss meringue buttercream would be a delicious addition.
Salted Caramel Whiskey Cake

Ingredients
- 1 1/2 sticks salted butter, room temperature
- 1 cup granulated sugar
- 1 cup brown sugar, not packed
- 2 tablespoons canola oil
- 3 eggs, room temperature
- 1 1/2 teaspoon vanilla
- 1 1/4 cup all-purpose flour
- 1 cup cake flour
- 1 teaspoon baking soda
- 1/2 teaspoon salt
- 2/3 cup Bird Dog Salted Caramel Whiskey
- 2/3 cup buttermilk, room temperature
- 1 stick salted butter, room temperature
- 8-ounce block cream cheese, room temperature
- 3 cups powdered sugar
- 1/2 cup salted caramel sauce (optional for decorating)
Instructions
- Preheat oven 350 degrees F. Generously butter and flour two 9" cake pans. To guarantee the cake won't stick, line the bottom of the greased cake pans with parchment paper rounds. Set aside.
- In a stand mixer, fitted with the paddle attachment, cream the butter and sugars on medium speed for 4 minutes. Drizzle the oil into the bowl on medium-low speed. Once incorporated, turn the mixer back to medium speed for another 1-2 minutes.
- Add eggs one at a time, briefly mixing batter on medium speed until smooth, scraping the bowl after each egg addition. Add in the vanilla and mix briefly.
- In a separate bowl, using a fine mesh sieve, sift the flours, baking soda and salt. Spoon and level the flours for an accurate measurement. In a glass measuring cup, whisk together the salted caramel whiskey and the buttermilk.
- Alternating between the dry ingredients and the whiskey mixture, add 1/3 of flour into the mixing bowl on low speed. Immediately follow with 1/2 of the whiskey followed by another 1/3 of the flour and the second 1/2 of the whiskey. Finish with the remaining flour mixture. The mixer should be kept on low speed, so the flour and liquid don't splash out of the bowl. Scrape the bowl, making sure any dry ingredients trapped at the bottom are brought to the top.
- Pour batter evenly into the prepared pans. Start assessing your cakes at 20 minutes, but they could take up to 25 minutes or longer to bake, depending on the oven temperature. When a toothpick inserted comes out clean, the cake is done. Cool pans for 10 minutes, before running a knife around the edge of the pan and turning out the cake. Place cake on wire rack to finish cooling. Once cake is cooled, cover with saran wrap and refrigerate for at least 1 hour. This step is optional, but makes icing the cake easier.
- In a stand mixer fitted with the paddle attachment, mix the cream cheese and butter on medium speed until there are no lumps and the consistency is smooth.
- Add sifted powdered sugar 1 cup at a time, mixing first on low speed to prevent splashing, then turning the mixer to medium-low until it's incorporated. Repeat process with remaining 2 cups of powdered sugar. Give the mixing bowl a good scrape and briefly mix one more time to complete the icing.
- Place one layer of cake on a clean turn table or cake board with a small dollop of icing underneath. This works as a glue, helping prevent the cake layers from sliding around while icing. Place a dollop of icing on top of the first cake layer, and spread evenly with a small offset spatula or knife. Add a few spoonsful of caramel, and gently spread on top of the icing. Lay the second layer, placing a large dollop of icing onto the top of the cake, smoothing evenly, letting any excess icing drop to the sides of the cake.
- With the rest of the icing, using an offset spatula, put an even layer of icing around the entire cake, with a back and forth motion.
- Using a bench scraper (also known as cake smoother) with your dominant hand, hold it steady against the cake, but slightly angled toward the cake, to aid in smoothing, and slowly move the turn table with the other hand, while not moving the scraper, and keeping it as straight and steady as possible. As excess icing builds on the scraper, wipe it back into the mixing bowl, and continue smoothing the cake with a clean scraper. This cake is intended to be semi-naked, so as you scrape the excess icing off the cake, bits of the cake underneath will be exposed. See blog pictures for reference.
- While smoothing the sides, a lip of icing will form around the top of the cake. Using an offset spatula, gently sweep away the lip with a motion toward the center of the cake. Rotate the cake, and sweep until the lip has been removed, and top of the cake is smooth. If desired add additional caramel to the top of the cake or create a caramel drip. Store cake in the refrigerator until 2 hours before serving.
You May Like These…