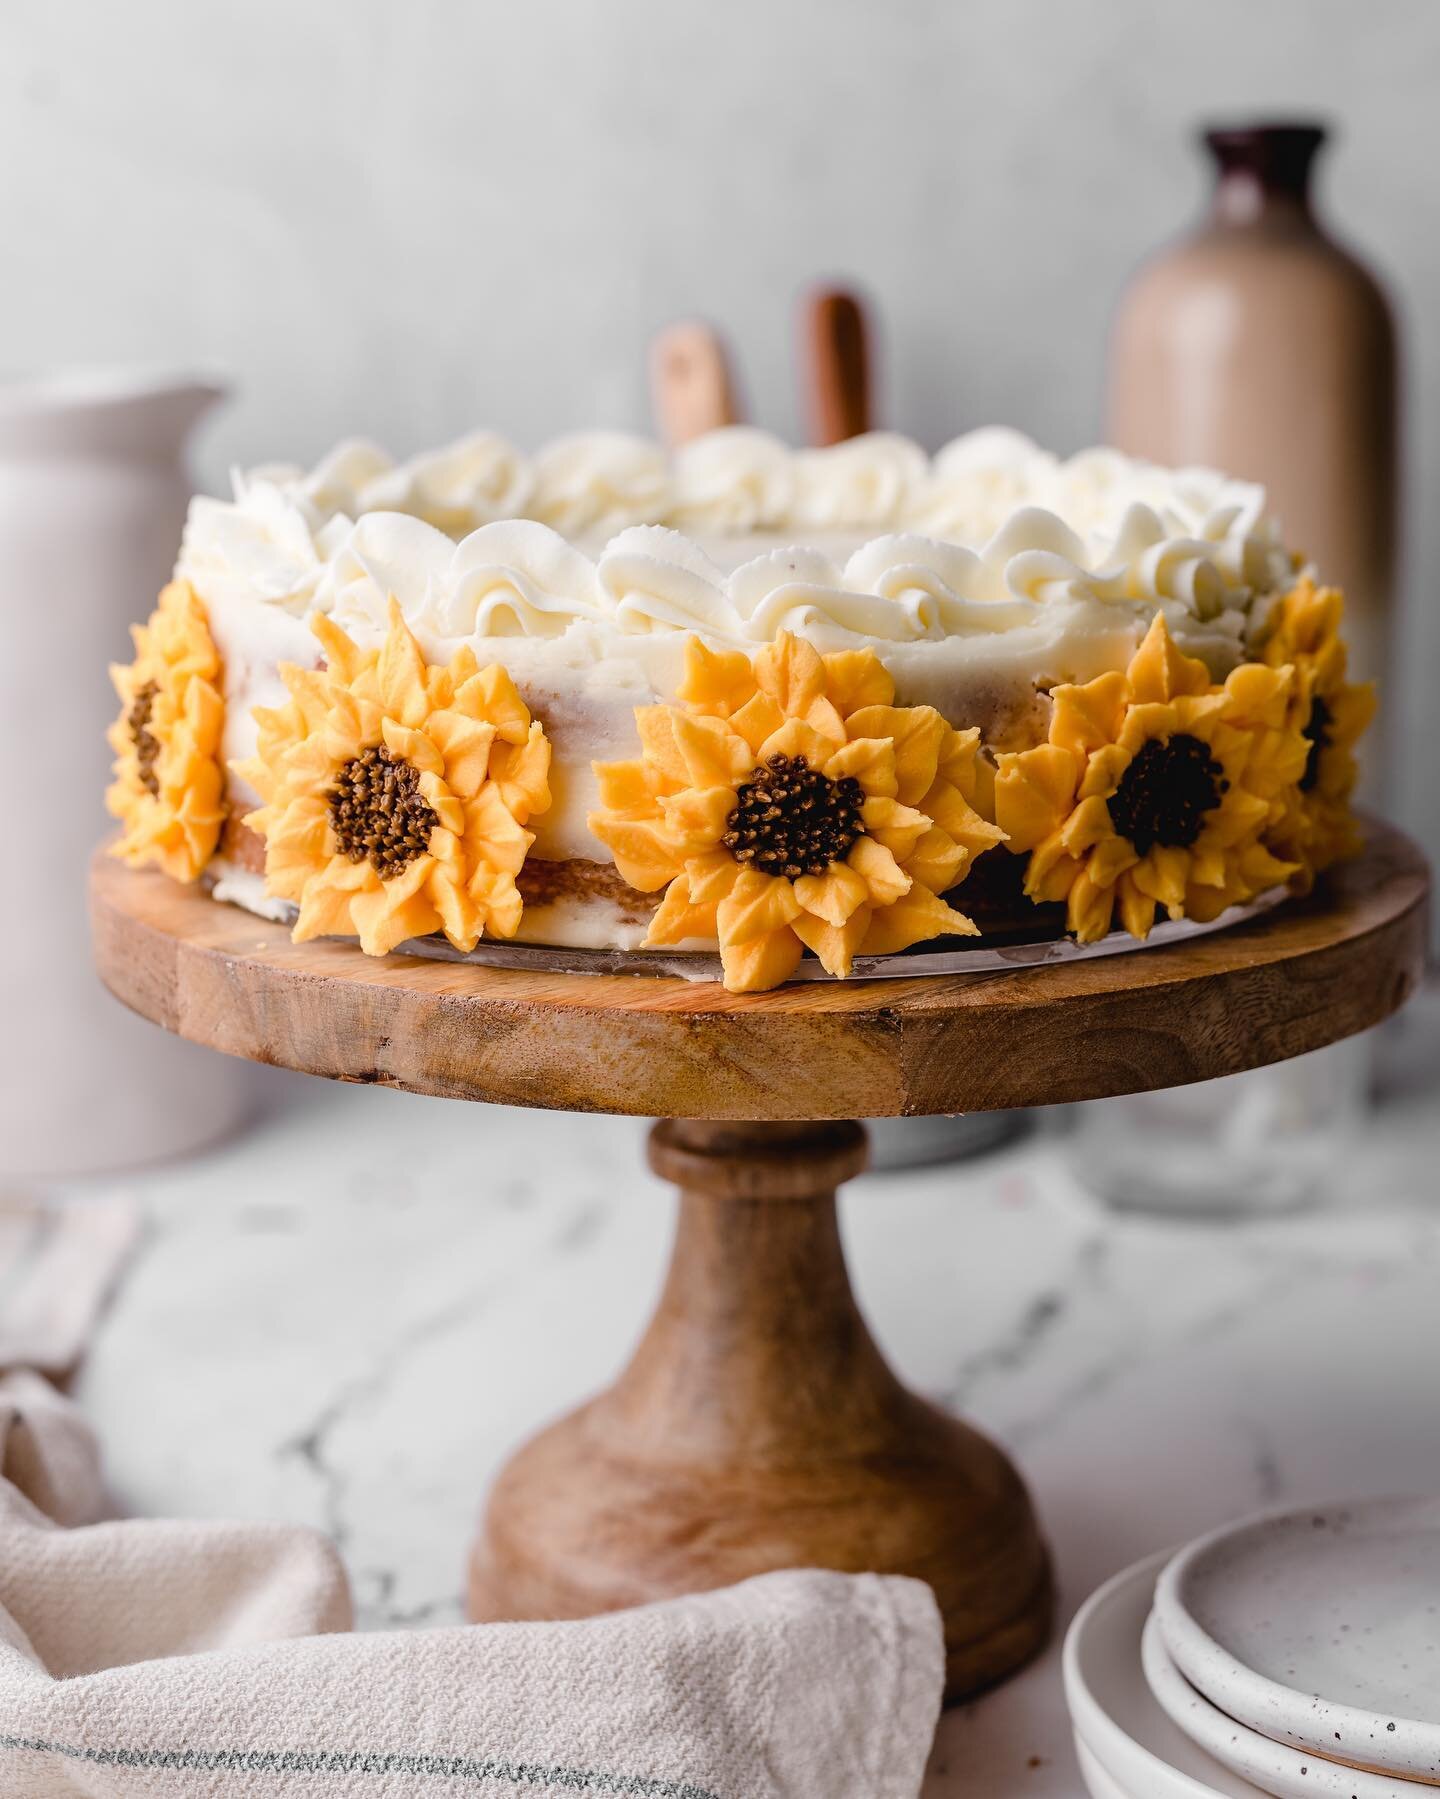
Pumpkin Spice Cake
This pumpkin spice cake has a delightful pumpkin flavor, the perfect amount of spice, and a tender crumb, that is covered in easy and delicious cream cheese icing.

Baking With Pumpkin
When baking with a purée—banana, applesauce, pumpkin—it is particularly difficult to get a fluffy texture that isn’t reminiscent of a bread or muffin. Pumpkin desserts are often bogged down and dense, but when done right, pumpkin cake can be as delicious, light and flavorful as it promises. When recipe testing, I do everything I can to steer away from a dense bread or muffin texture.
What makes this cake different? A few things, including ingredients like cake flour and buttermilk, but also the method, like getting plenty of air into the batter and also sifting the dry ingredients, using a fine mesh sieve. I always take pictures of my cake slices because texture is critical in cake making, and it helps to see how the crumb should look when finished. This cake is not overly spiced, but does give a delightful taste of cinnamon and nutmeg. The cream cheese icing is a perfect pairing for pumpkin spice, and isn’t too thick, making it delicious and easy to decorate.
As discussed previously, bringing dairy to room temperature is a helpful step in cake making, and you can learn why, here in the intro text under “Bringing Dairy To Room Temperature.” But what else can be done to achieve that tender crumb expected from bakeries? Below are five tips to help crack the cake making code.

Five Cake Tips
1.) Fluffing the butter and sugars is key. Once added to the mixer, let the butter and sugars mix on medium to medium-high speed for a few minutes. I give time estimates in the directions, but I let the butter and sugars mix—sometimes not even looking at the clock— getting my eggs to room temperature and shuffling around the kitchen preparing the dry ingredients. Further, after adding the 2 tablespoons of oil, switch the mixer back to medium or medium high speed, continuing to let the batter fluff for a couple more minutes. Why so much mixing? Think of it this way, the air put into the batter in these first steps determines the texture of the cake while baking. The rest of the ingredients, eggs, flour, and buttermilk are added in a certain way to try and protect this first process, in hopes to not disrupt or deflate all the air that was initially put into the batter. A light and fluffy crumb is the end goal. In short, don’t rush it!
2.) Add eggs one at a time. After bringing the eggs to room temperature, crack the eggs into the batter one at a time, switching the mixer to medium for a few seconds until the egg is mixed and the batter is smooth, keeping that fluffy texture. Scrape the bowl, mix again for a just a moment, repeating this method with the remaining eggs. Adding too many eggs at once can split the cake batter. This isn’t the end of the world, but can definitely affect the texture of the cake in a negative way, deflating the air created by fluffing the butter and sugars. If done properly, eggs help to maintain the fluff, while also bringing necessary structure to the cake. You may be thinking, “what if I over mix the eggs?” Good point, and it’s frustrating because recipes often say “don’t over mix,” without giving much explanation, and it’s true, “don’t over mix” is sage advice, but what does that mean exactly? Those words feel like a cop out! The unfortunate truth is it’s often ambiguous, because it is hard to pin point an exact time. Mixing enough is important, but mixing too much can cause a tough or gummy cake. It’s frustrating, I know, but as confidence builds in the kitchen you will learn the balance that is mixing, I promise.
3.) Scrape the mixing bowl at various times while preparing the batter. Using a rubber spatula, scrape the sides and bottom of the bowl bringing any trapped ingredients to the top of the bowl—semi frequently. If a pocket of leavening is trapped at the bottom of the batter it will definitely influence how the cake bakes in the oven. An even batter = a better bake. This is good advice as it is simple and effective.
4.) If included, turn on the convection setting for baking. If your oven does not have a convection feature, don’t worry, just be aware cake pans can finish baking at different times—heat isn’t always distributed evenly. Even with the convection feature used on my oven, I rarely pull my cakes out at the same time, but the convection feature does help to circulate the air helping the cakes bake evenly. Many people don’t use this feature or know it is a viable option. In short, if you have it, use it.
5.) Don’t delay getting cake pans into the oven. This does not mean rush in making the batter, but it does mean get your cakes poured into their pans swiftly and into the oven promptly. For example, don’t take a phone call when you’re about to put your cakes in the oven, or get distracted with the doorbell. Remember all the work that just went into ensuring a light and delicious crumb. Inevitably, if the cakes are left on the counter they will start to deflate before they have had a chance to bake. This is doubly true for cakes that have egg whites mixed in before baking! Don’t squander your efforts and get those beautiful pans into the oven.

Final Tip
The oven is best left shut until the cakes are baked and ready to be removed. Opening and shutting the oven frequently is another common perpetrator for cakes that sink or loose their lift. Watch your cakes closely as they are baking, and start checking close to the time they are normally finished, which for my oven is roughly 20 minutes. Enjoy!
Pumpkin Spiced Cake

Ingredients
- 1/2 cup butter, softened
- 2 tbsp canola oil
- 1/2 cup granulated sugar
- 1/2 cup brown sugar
- 2 large eggs, room temperature
- 1 cup all purpose flour
- 1/2 cup cake flour
- 2 tsp baking powder
- 1/2 tsp soda
- 2 tsp cinnamon
- 1/4 tsp ginger
- 1/4 tsp nutmeg
- 1/2 tsp salt
- 1/2 cup buttermilk, room temperature
- 1/2 cup canned pumpkin puree
- 8 ounces block of cream cheese, softened
- 1/2 cup butter, softened
- 3 cups powdered sugar, sifted
- 1 1/2 tsp vanilla
Instructions
- Preheat oven 350 degrees F. Butter and flour three 6" cake pans. Set aside.
- In a mixer, fitted with the paddle attachment, cream the butter and sugars on medium high speed for 3 minutes. Drizzle the oil into the bowl on low speed. Once incorporated, turn the mixer back to medium high speed for another 1-2 minutes.
- Add eggs one at a time, mixing batter until smooth and scraping the bowl after each egg addition. See intro for more detailed information about adding eggs to cake.
- In a separate bowl, using a fine mesh sieve, sift the flours, baking powder, soda, cinnamon, ginger, nutmeg and salt. Spoon and level the flours for an accurate measurement.
- Add measured buttermilk and pumpkin puree into a glass measuring cup and whisk until smooth.
- Alternating between dry ingredients and the buttermilk puree mixture, add 1/3 of flour into the mixing bowl on low. Immediately follow with half of the buttermilk puree, followed by another 1/3 of the flour and the second half of the buttermilk puree. Finish with the remaining flour mixture. The mixer should be kept on low, so the flour and buttermilk don't splash out of the bowl. Scrape the bowl, making sure any dry ingredients trapped at the bottom are brought to the top. After scraping, turn the mixer up to medium for just a few seconds ensuring the batter is fully mixed and smooth.
- Pour batter evenly into prepared pans. Bake for 20 minutes or until a toothpick inserted comes out clean. Watch the cake pans carefully as every oven varies in temperature. Cool pans for 10 minutes before running a knife around the edge of the pan, and turning out the cake. Place cake on wire rack to finish cooling.
- With an electric mixer fitted with the paddle attachment, mix the cream cheese and butter on medium speed until there are no lumps and the consistency is smooth.
- Add sifted powdered sugar to the bowl, one cup at a time, mixing first on low speed to prevent splashing, then turning the mixer to medium high for 30 seconds. Repeat process with remaining two cups of powdered sugar. Add vanilla and mix on medium for a few more seconds. Give the mixing bowl a good scrape and briefly mix one more time to complete the icing.
- Place bottom layer of cake on a clean turn table or cake board with a small dollop of icing. This works as a glue, helping prevent the cake layers from sliding around while icing. Place a large dollop of icing on top of the first cake layer, and spread evenly with a small offset spatula or knife. Place the second cake layer on top of icing. Place another large dollop of icing onto the cake, smoothing evenly and finishing with the last cake layer. At this time, stop and assess the cake, making sure its straight and even. If not, carefully adjust the cake, straightening and moving it as needed.
- Starting at the top of the cake and using an offset spatula, put a thin layer of icing around the entire cake, with a back and forth motion, scrapping off any excess icing. The cake underneath should be visible. This thin layer of icing is called a crumb coat. It's main purpose is to trap any cake crumbs, making the final layer of icing smooth and easy to apply. Refrigerate cake for at least 30 minutes to 1 hour, or even overnight, before applying the final layer of icing.
- Once crumb coat is chilled, using an offset spatula, carefully apply icing around the cake as evenly as possible, starting with the top and working to the sides, again using a back and forth motion. If a more rustic look is desired the cake can be finished here. For a smoother cake, once the icing is evenly applied, take a bench scraper (also known as cake smoother) and hold it steady against the cake, but slightly angled toward the cake, to aid in smoothing. Slowly move the turn table with the other hand while not moving the scraper and keeping it as straight and steady as possible. Be gentle, and aim for scraping only a bit of icing each time smoothing the cake. As excess icing builds on the scraper, place it back into the mixing bowl, and continue smoothing the cake with a clean scraper. For any uneven areas or large air pockets, using a small offset spatula, fill in with icing as needed. Continue smoothing the cake until the desired look is achieved.
- While smoothing the sides, a lip of icing will form around the top of the cake. Using an offset spatula, gently sweep away the lip with a motion toward the center of the cake. Rotate the cake and sweep until the lip has been removed and top of the cake is smooth. Any leftover icing can be used to additionally decorate the cake with a beaded boarder, or another decoration of choice. Store cake in the refrigerator until 2 hours before serving.
You May Like These…