Orange & Chocolate Speckled Cake
With the perfect balance of orange and dark chocolate, this special treat is as uniquely delicious, as it is beautiful.

I’d like to think this cake is not only delicious, but also boasts an element of feeling special and dare I say, fancy. I first got the idea for a speckled chocolate cake from my friend’s blog, Eat More Cake By Candice— her blog can be found here. I have always enjoyed the combination of chocolate and orange, so I decided to create my own version of a speckled cake, marrying two flavors I simply adore. Orange and Chocolate Speckled Cake was born and is here to stay.
What Makes This Chocolate Speckled Cake Special?
One of the things that makes this cake special is the care taken to bring forward the orange flavoring. To achieve this, I used a combination of reduced fresh orange juice, fresh orange zest and a bit of orange extract. Between these three approaches, the cake has a lovely orange flavor that is present, without being overpowering or artificial tasting.
The chopped chocolate gives additional texture when eating, adding another special component to the cake. Further, by using dark chocolate the cake isn’t overly sweet, which can sometimes be the downfall with desserts that feature fruit. The cream cheese icing brings a complimentary tang to the cake and pairs nicely with chocolate and orange.

Tips and Tricks for Orange and Chocolate Speckled Cake
1.) When reducing orange juice, consider using a tangerine or a few cutie’s, like these. These varietals tend to yield powerful flavor, and this is even more so the case once the juice is reduced. By reducing orange juice for the cake we are concentrating the flavor, without bogging down the batter with too much liquid. In a pinch, regular orange juice can be used, but fresh will yield better flavor.
2.) Use quality dark chocolate. This is an orange and chocolate cake after all, and by using a quality dark chocolate, the cake will taste better. I prefer Chocolate brands such as Scharffen Berger, Ghirardelli, and even the Pound Plus Bars at Trader Joes, which are the perfect combination of delicious and affordable.
3.) Use full fat buttermilk. At my local grocery store I am able to buy this buttermilk, which is a full fat buttermilk. It certainly doesn’t need to be this brand, but I find that a low-fat buttermilk doesn’t yield as tender or flavorful of cake.
4.) Don’t skip the cake flour. When baking, we often want to make something easy, sporting things already in our pantry. I get this, but a special cake—like this—is going to require planning and a stop at the grocery store. Once cake flour is introduced, it’s hard to go back. Cake flour is used in bakeries so why do people shy away from it at home?
5.) Spoon and level flour for an accurate measurement. I know I am a broken record with this statement, but remember, if your flour is packed into a measuring cup, the cake will be dense and dry.

Best Way To Store Layer Cakes
When I first started making, and eventually selling cakes, it was a learning curve. How do I tell when the cake is properly baked? How do I store the cake if I don’t want to decorate it same day? How do I get those perfectly smooth edges? Those ruffly tops?
When making layer cakes, there are a few different approaches, but I have found and settled on what works for me. In tackling the best way to store cakes, I have utilized both the refrigerator and the freezer.
Once the cake layers are baked, I let them cool inside their tins for ten minutes before running a knife around the edge, and inverting onto a cooling rack. Once the cakes are cooled, they can either go into the refrigerator or the freezer. If I am planning to decorate the cake the next day, I usually will place the cake layers in fridge with two layers of saran wrap on each cake layer. Some argue that placing cakes into the fridge dries them out, but I haven’t noticed this with my cake recipes.
If I need to decorate the cake the same day (meaning I need it to cool quickly) or in a few days (meaning I want the layers to stay fresh), I will place the cake in the freezer. To do this, I wrap the cake in saran wrap and then cover with tin foil. Using the tin foil helps the cake from getting frostbite, especially if the cake won’t be decorated for a week or more.
To decorate the cake, no need to defrost the cake before stacking and decorating. In fact, many decorators swear by decorating a frozen cake. It keeps the cake from sliding around, and is easier to work with. Just keep in mind, if decorating with frozen cake, make sure to work quickly as the buttercream will harden as it’s manipulated on the cold cake.
Once the cake is decorated, I store it in the fridge until needed. If the cake is decorated with American Buttercream, and doesn’t have any time sensitive fillings inside, it can technically be left out on the counter without concern, but avoid direct sunlight at all cost. If the cake is covered in cream cheese icing, the cake should remain in the fridge until 1-2 hours before enjoying. Any leftovers should be placed back in the fridge.
Final Tip
If interested in dehydrating orange peels to decorate, as pictured, more information can be fund here. I used a dehydrator like these, here, since it is also useful in making sugar cookies.
Orange & Chocolate Speckled Cake

Ingredients
- 6 ounces dark chocolate
- 2 tablespoons orange zest
- 1/2 cup butter, softened
- 1/4 cup canola oil
- 1 1/2 cup granulated sugar
- 3 eggs, room temperature
- 1 1/2 teaspoon pure vanilla extract
- 1/2 teaspoon orange extract
- 1 cup all-purpose flour
- 3/4 cup cake flour
- 1 teaspoon baking powder
- 1/2 teaspoon baking soda
- 1/2 teaspoon salt
- 1 cup fresh orange juice
- 1 cup buttermilk, room temperature
- 8 ounce block cream cheese, softened
- 1 stick butter, softened
- 3-4 cups powdered sugar
- orange extract, to taste
- orange zest, to taste
Instructions
- Preheat oven 350 degrees F. Generously butter and flour three 6" cake pans. To guarantee the cake won't stick, line the bottom of the greased cake pans with parchment paper rounds. Set aside.
- Using a small sauce pan, heat 1 cup orange juice until just boiling. Reduce juice to a simmer and cook until it has reduce by half. Set aside to cool.
- Chop dark chocolate into chunks of varying size. Rub the orange zest into the chocolate and set aside.
- In a mixer, fitted with the paddle attachment, cream the butter and sugar on medium speed for 3 minutes. Drizzle the oil into the bowl on medium-low speed. Once incorporated, turn the mixer back to medium speed for another 2 minutes.
- Add eggs one at a time, briefly mixing batter on medium speed until smooth, scraping the bowl after each egg addition. Add vanilla, orange extract and mix until incorporated.
- In a separate bowl, whisk together the flours, baking powder, baking soda and salt. Spoon and level the flours for an accurate measurement.
- Add buttermilk into a glass measuring cup. Alternating between the dry ingredients and the buttermilk, add 1/3 of flour into the mixing bowl on low speed. Immediately follow with 1/2 of the buttermilk, followed by another 1/3 of the flour and the second 1/2 of the buttermilk. Finish with the remaining flour mixture. Add reduced orange juice and mix until just incorporated. The mixer should be kept on low speed, so the flour and liquid don't splash out of the bowl. Scrape the bowl, making sure any dry ingredients trapped at the bottom are brought to the top, and briefly mix one more time. Gently stir in the chopped chocolate and orange zest.
- Pour batter into prepared pans and bake. Start assessing your cakes at 25 minutes, but they could take up to 30 minutes or longer to bake, depending on your oven's temperature. When a toothpick inserted comes out clean, the cake is done. Cool pans for 10 minutes before running a knife around the edge of the pan, and turning out the cake. Place cake on wire rack to finish cooling. Once cake is cooled, cover with saran wrap and refrigerate for at least 1 hour. This step is optional, but makes icing the cake easier.
- With an electric mixer fitted with the whisk attachment, mix the cream cheese and butter on medium speed until there are no lumps, and the consistency is smooth. Add orange extract and zest and mix until incorporated.
- Add sifted powdered sugar to the bowl, 1 cup at a time, mixing first on low speed to prevent splashing, then turning the mixer to medium-low until it's incorporated. Repeat process with remaining 2 cups of powdered sugar. Briefly mix one more time to complete the icing. For a fluffier icing, the whisk attachment can be used.
- Place one layer of cake on a clean turn table or cake board with a small dollop of icing underneath. This works as a glue, helping prevent the cake layers from sliding around while icing. Place a dollop of icing on top of the first cake layer, and spread evenly with a small offset spatula or knife. Place the second cake layer on top of icing and repeat process. Once the third and final layer has been set, place another dollop of icing onto the top of the cake, smoothing evenly, letting excess icing drop to the side of the cake.
- With the rest of the icing, using an offset spatula, put a even layer of icing around the entire cake, with a back and forth motion.
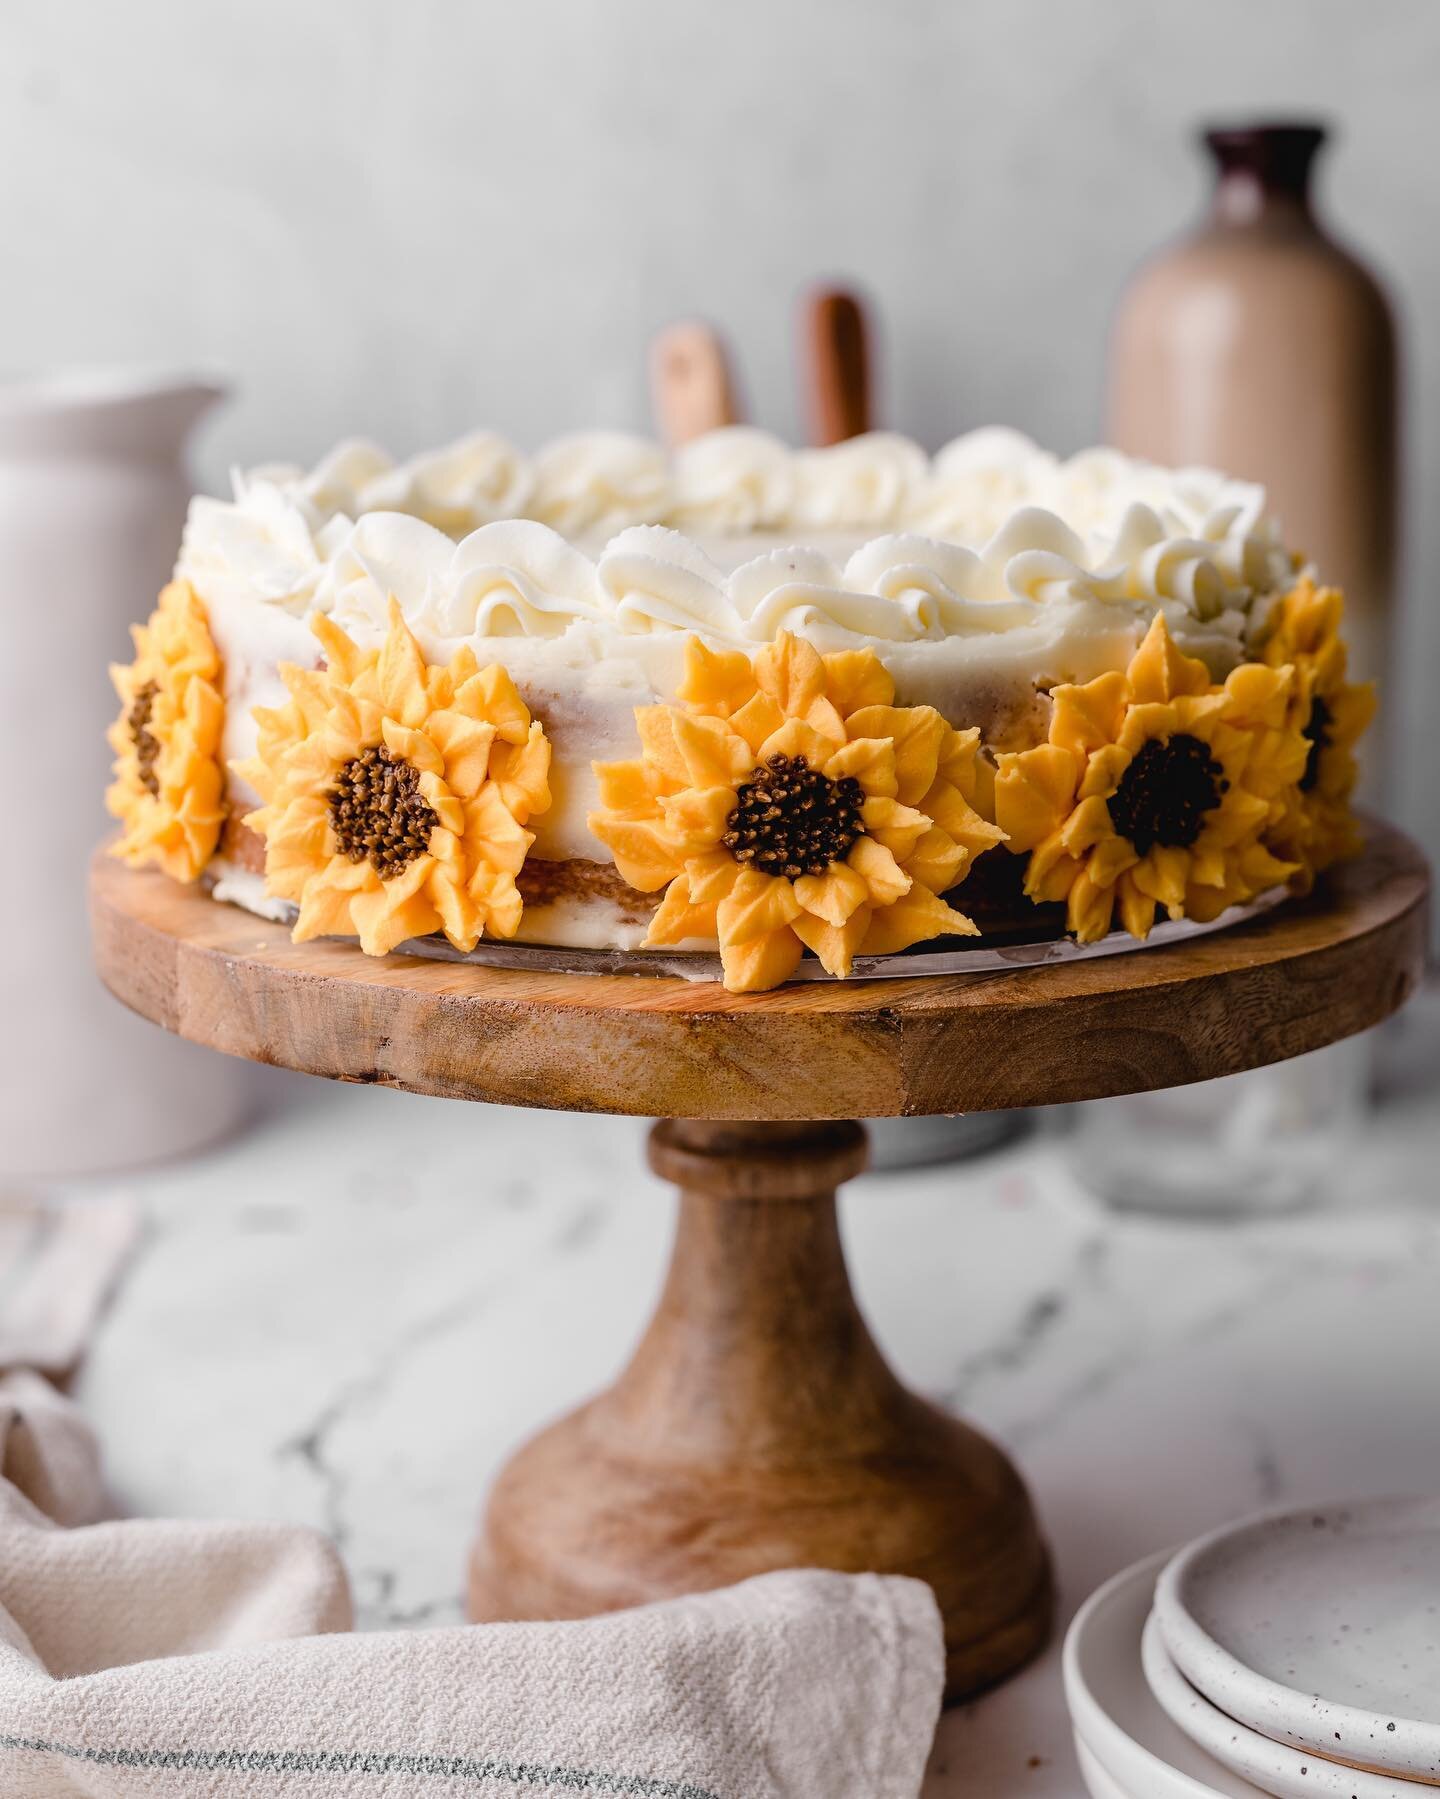
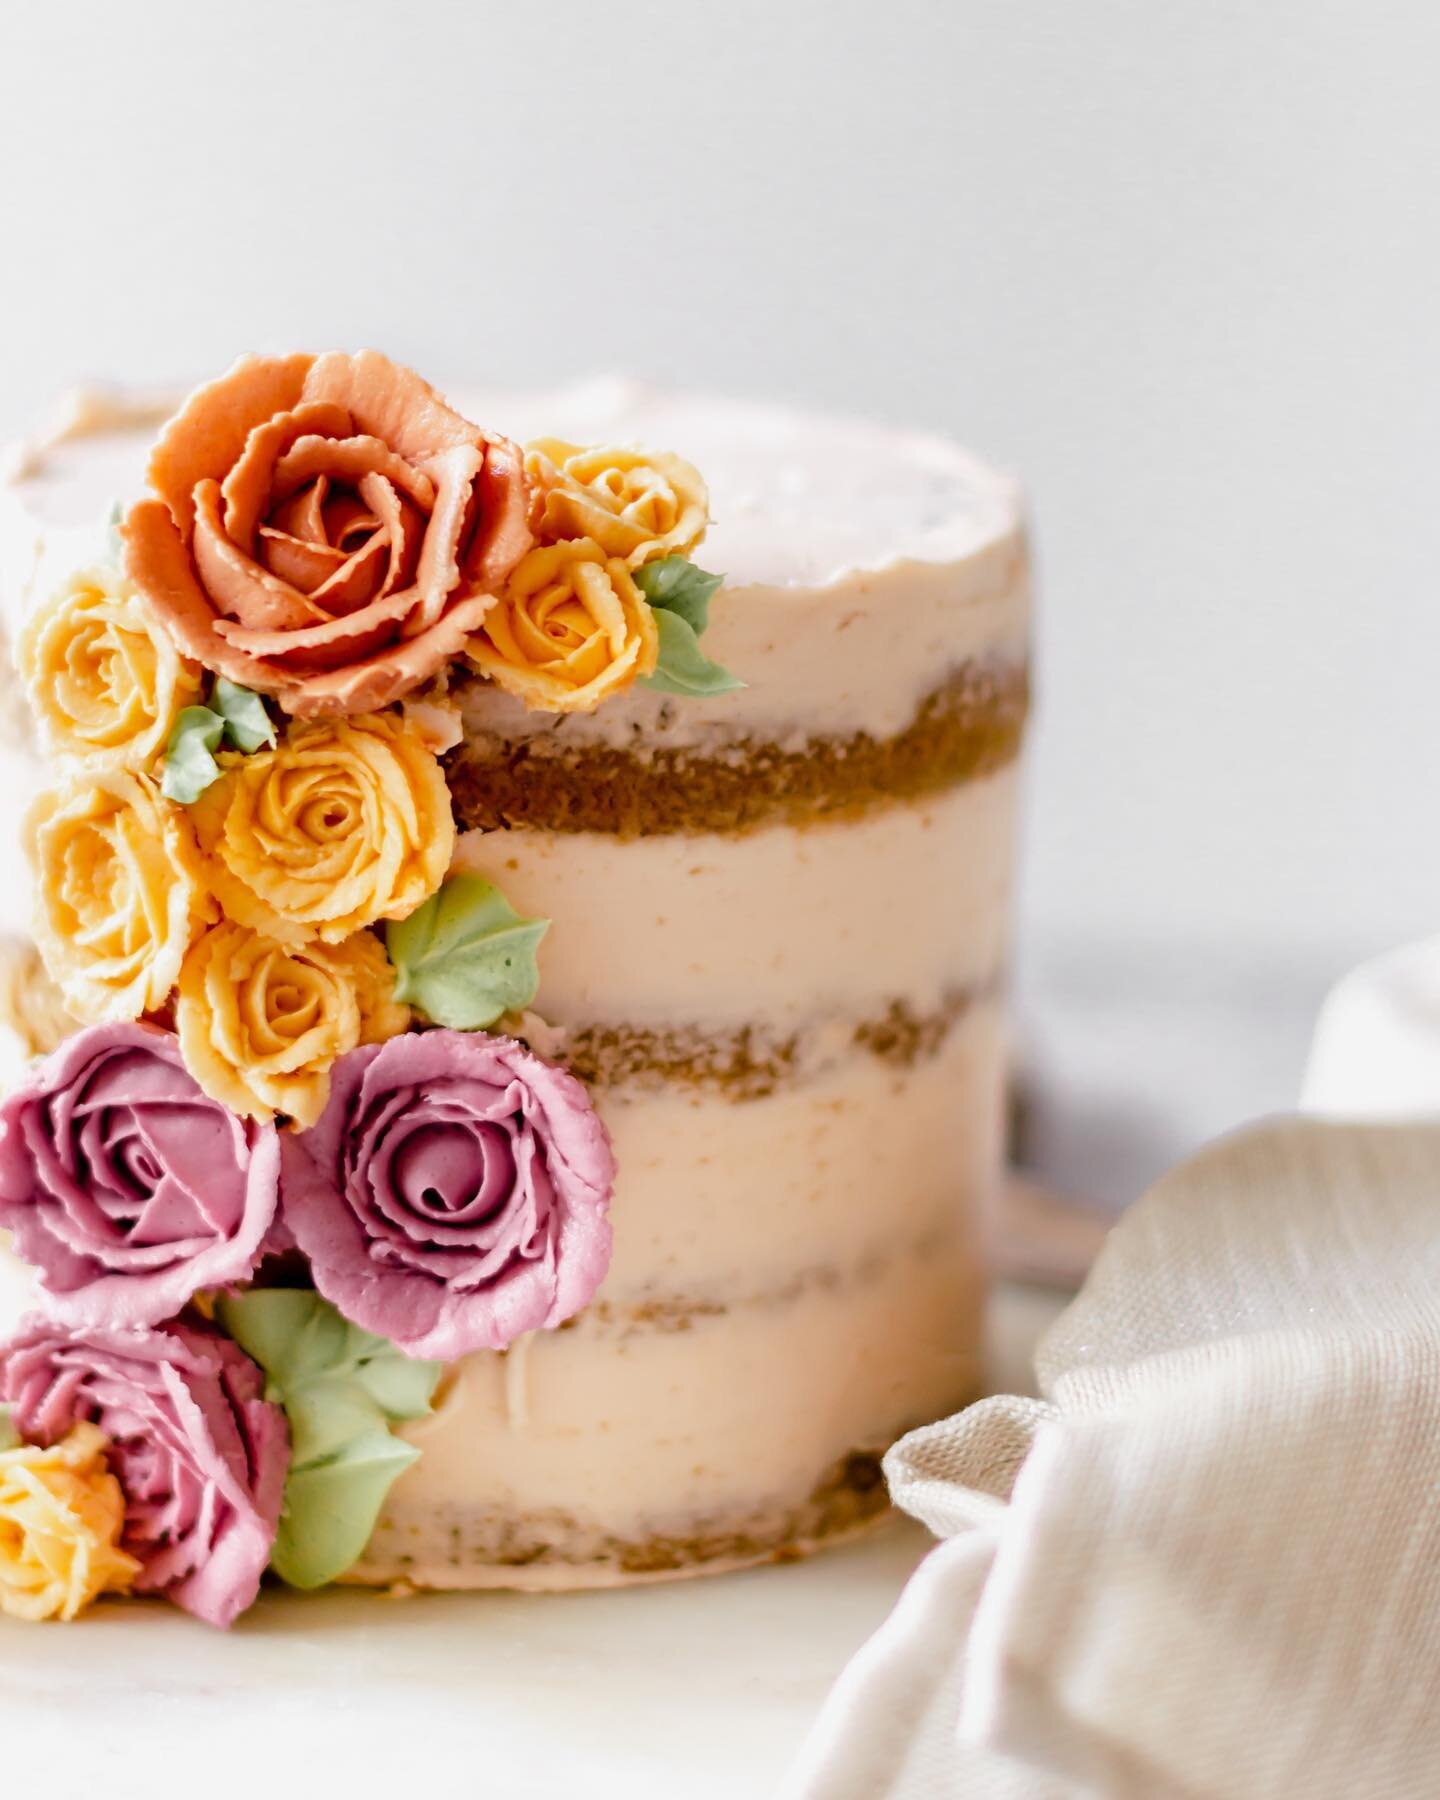
- Using a bench scraper (also known as cake smoother) with your dominant hand, hold it steady against the cake, but slightly angled toward the cake, to aid in smoothing, and slowly move the turn table with the other hand, while not moving the scraper, and keeping it as straight and steady as possible. As excess icing builds on the scraper, place it back into the mixing bowl, and continue smoothing the cake with a clean scraper. This cake is intended to be semi-naked, so as you scrape the excess icing off the cake, bits of the cake underneath will be exposed. See blog pictures for reference.
- While smoothing the sides, a lip of icing will form around the top of the cake. Using an offset spatula, gently sweep away the lip with a motion toward the center of the cake. Rotate the cake, and sweep until the lip has been removed, and top of the cake is smooth. Any leftover icing can be used to decorate the cake with swirls. Chunks of Scharffen Berger chocolate, as picture, is the perfect finishing touch. Store cake in the refrigerator until 2 hours before serving.
You May Like These…